Use template editor
The editor is divided into three primary zones to keep your workflow organized:
Documents Section (Left Sidebar): Manage the files within your template. You can add multiple documents, reorder/replace the documents, or remove/delete documents.
Fields Section (Right Sidebar): Your toolbox. Drag and drop field types (Signature, Text, Date, etc.) onto the document.
Page Section (Center Canvas): The active workspace where you position fields and interact with the document content.
- Upload or replace documents
- Edit documents
- Fields selection & bulk editing
- Field actions & context menu
- Copy & paste fields
- Field positioning & size
- AI-powered field detection
- Revisions history
Upload or replace documents
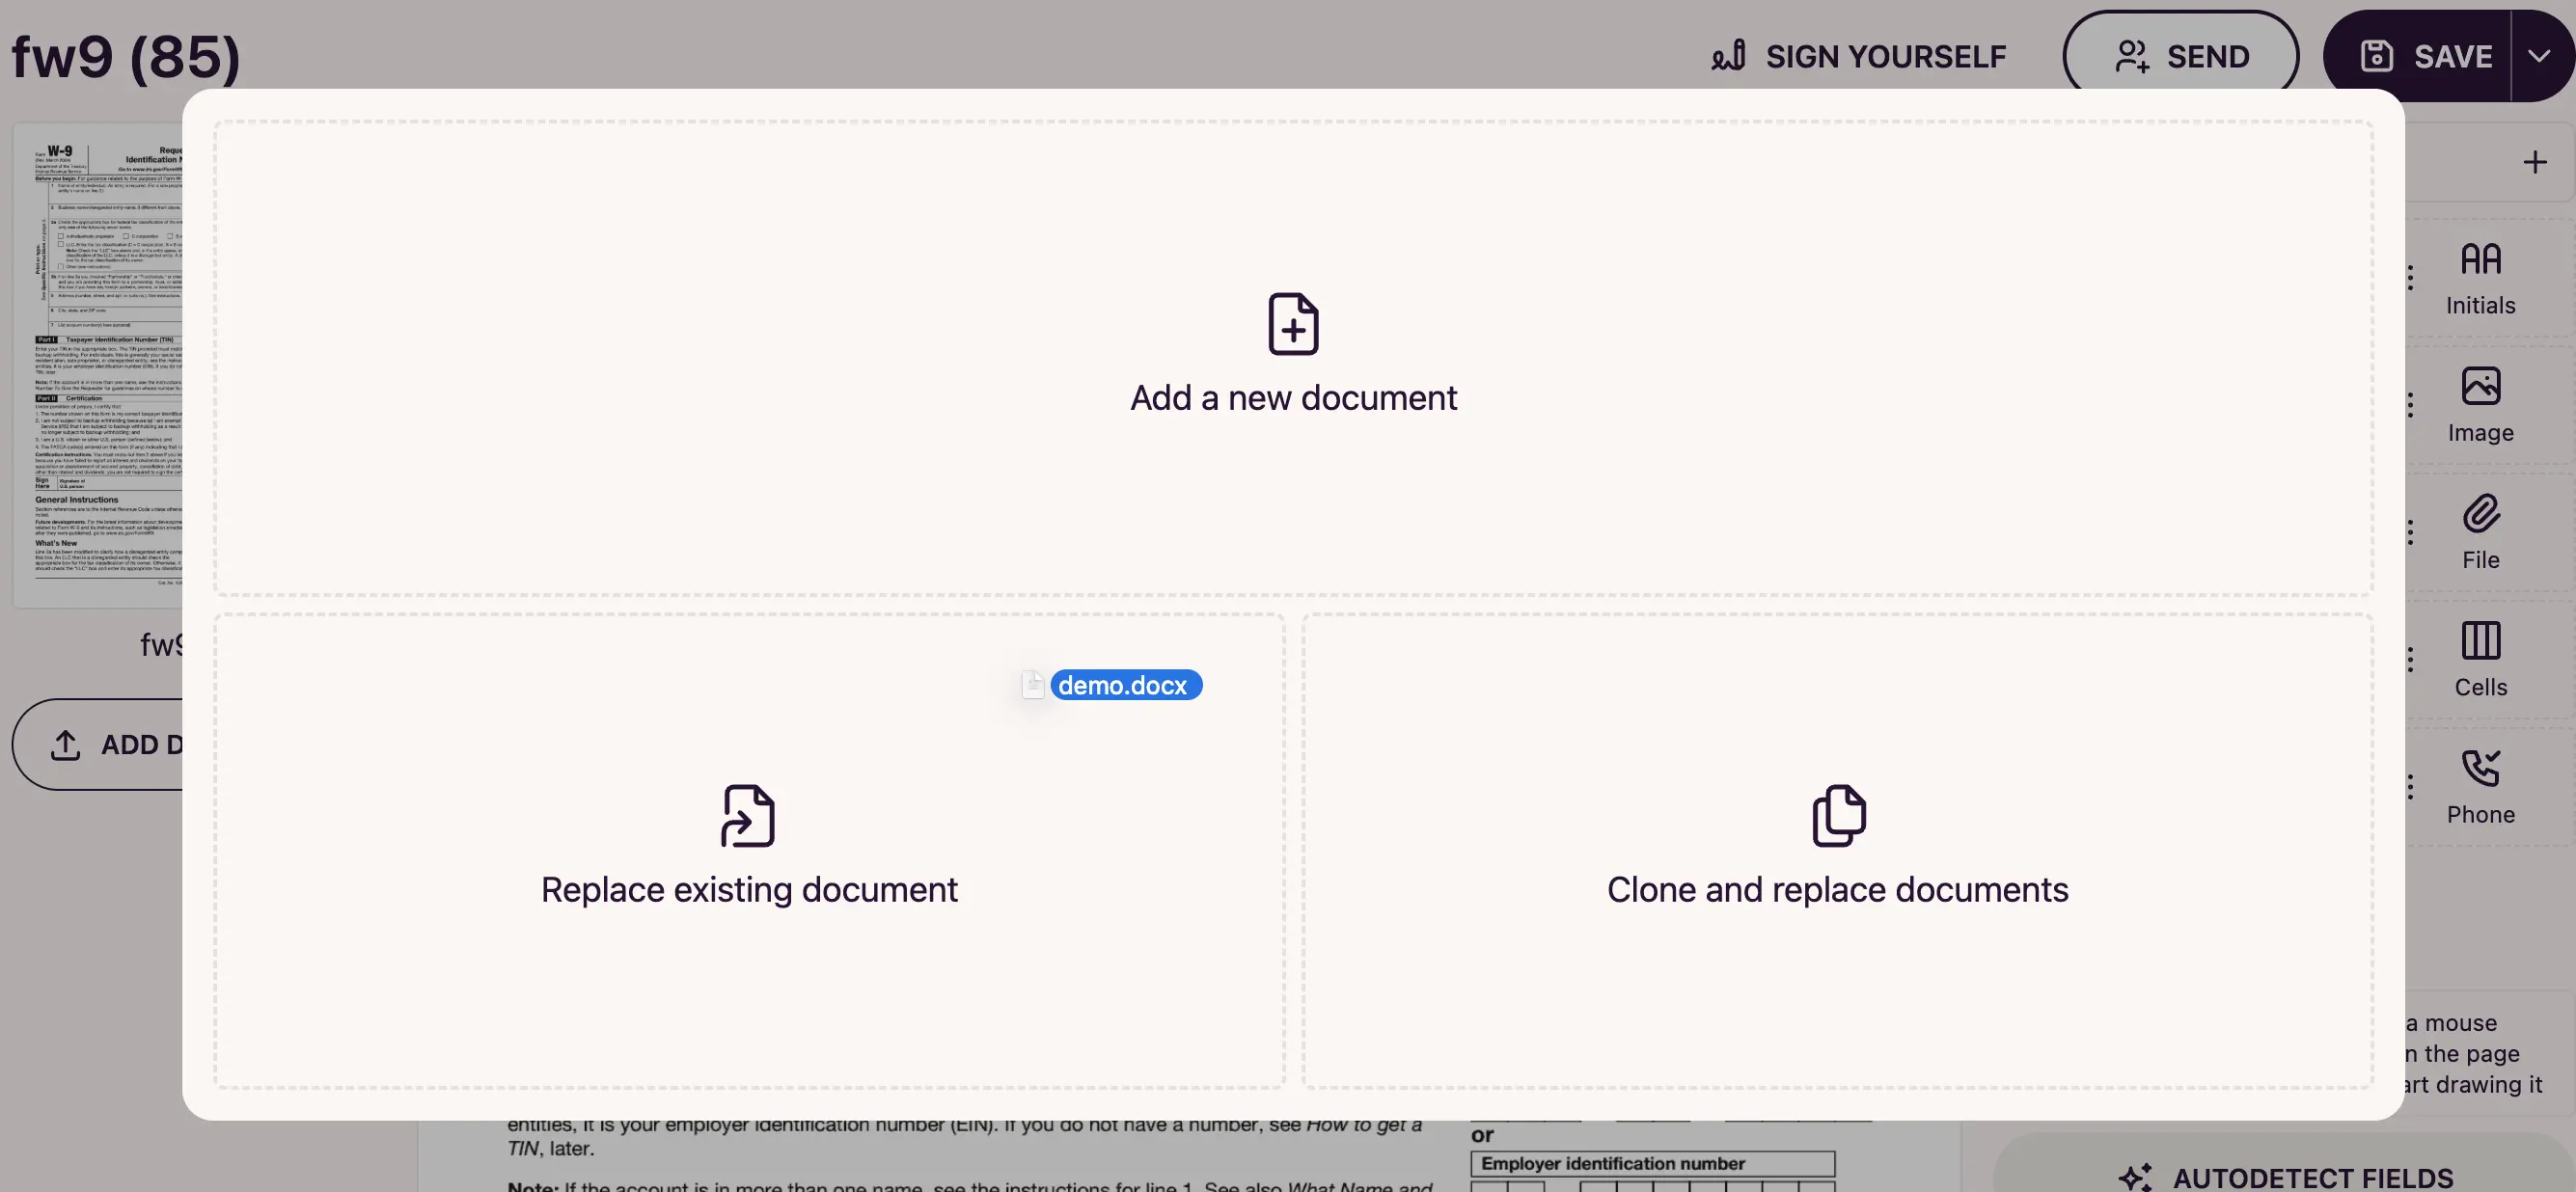
When you drag & drop a document file into the template editor, a modal appears with 3 available actions:
- Add a new document: Drag & drop a new file from your computer into the Documents Section (left sidebar).
- Replace existing document: Drop the file onto an existing document to swap the pages while keeping the fields in place.
- Clone and replace document: Use this to create a new version of the template with the same field layout but an updated file.
Edit documents
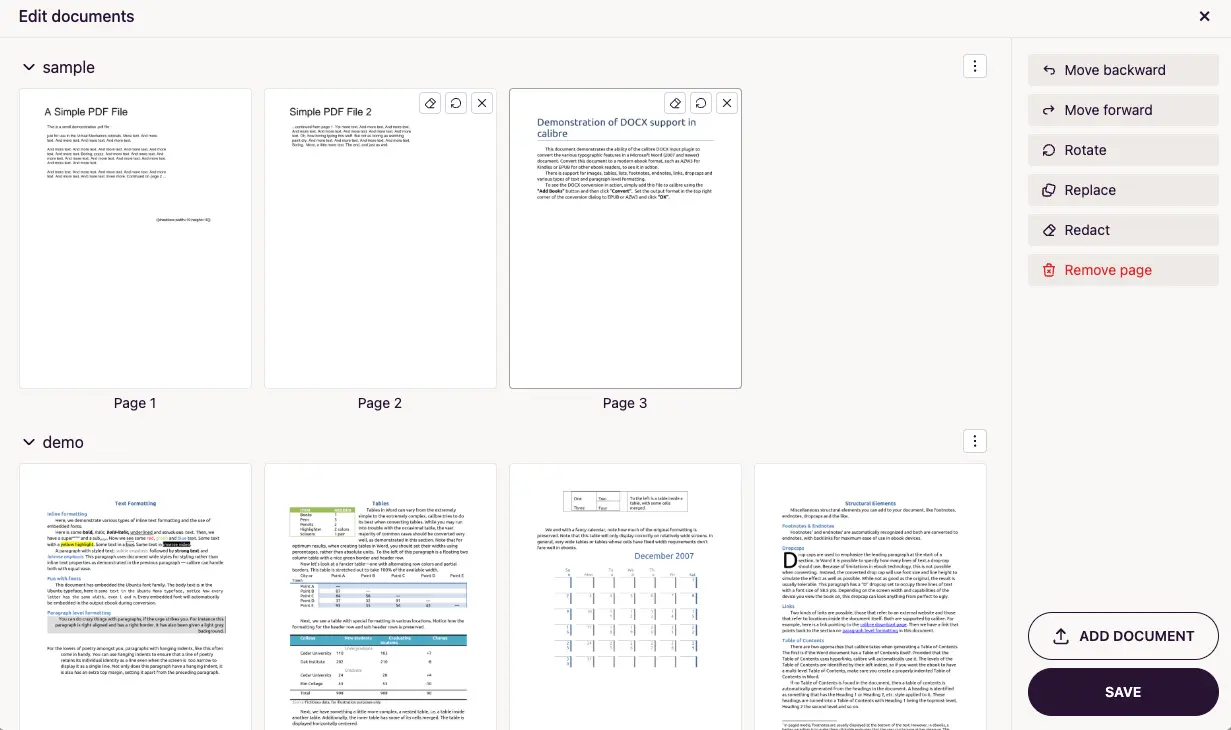
In the documents list on the left, click a document’s menu () icon and select Edit to open the document editor. From here you can edit the documents and pages within your template:
- Reorder pages by dragging and dropping them, or use the “Move backward” and “Move forward” buttons.
- Merge documents by dragging the pages of one document into another.
- Add or remove pages with the “Add document” and “Remove page” buttons.
- Rotate or crop pages using the “Rotate” and “Crop” buttons.
- Redact pages to permanently remove sensitive content.
- Convert photos to a scan to turn document photos into clean PDF pages.
Fields selection & bulk editing
There are two primary ways to create a selection group:
-
Precision Selection (CTRL+Click): Hold the CTRL key (or Cmd on Mac) and click on individual field areas. This is best for picking specific, non-adjacent fields across a page.
-
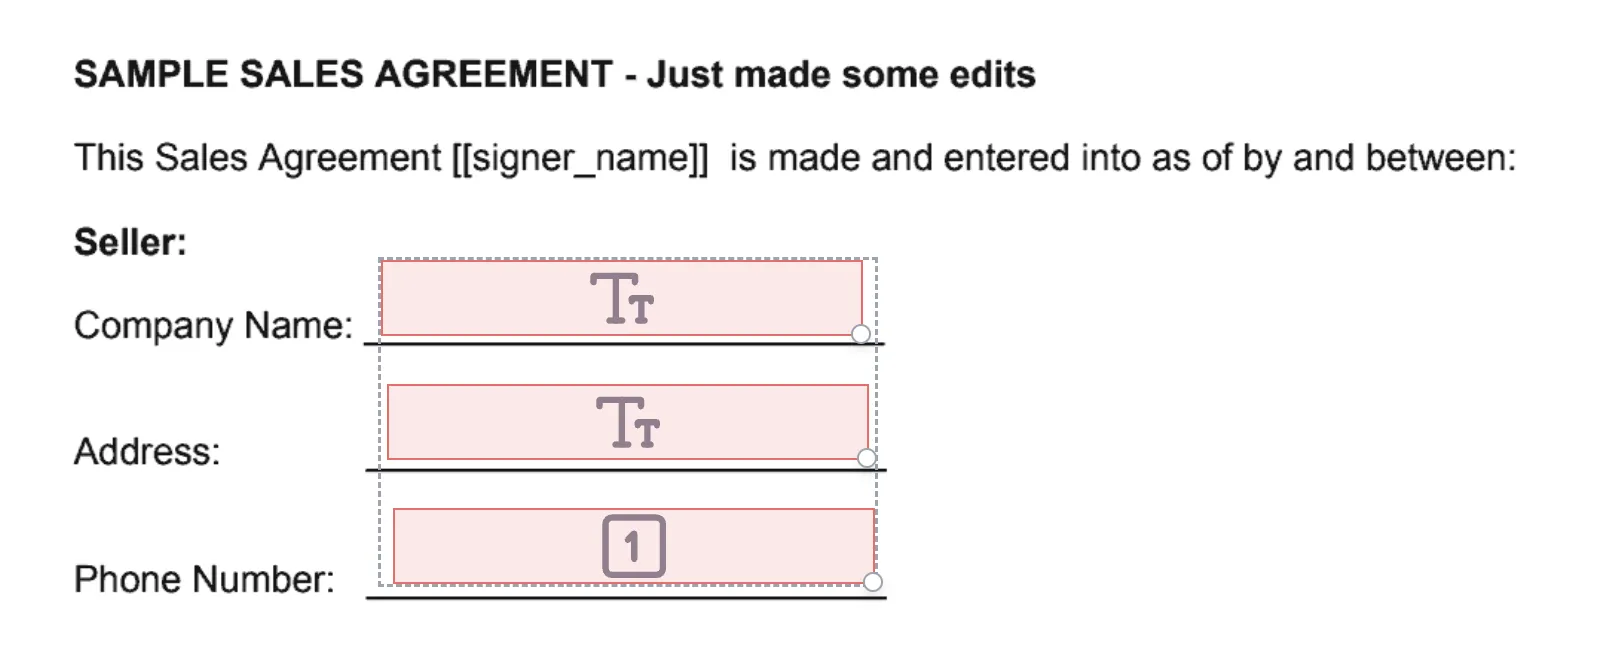
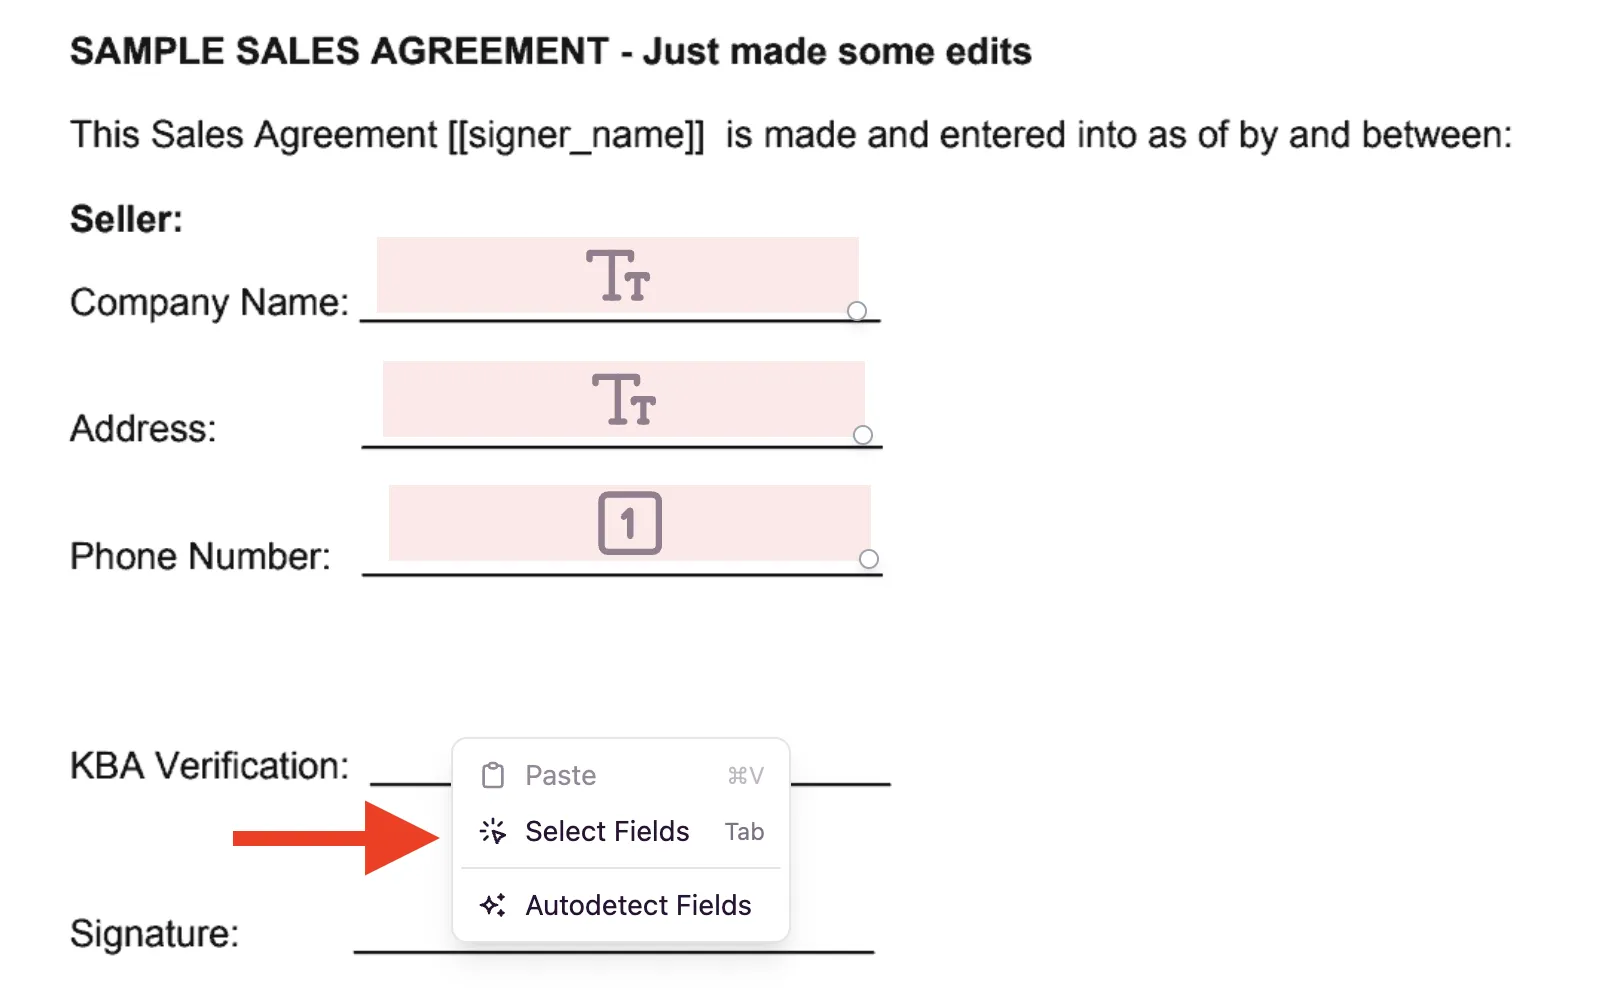
Area Selection (Selection Mode): Toggle the editor to Selection Mode via the context menu (Right-click → Select Fields) or by pressing the Tab key. Once active, click and drag your mouse to draw a selection box over the desired fields.
Field actions & context menu
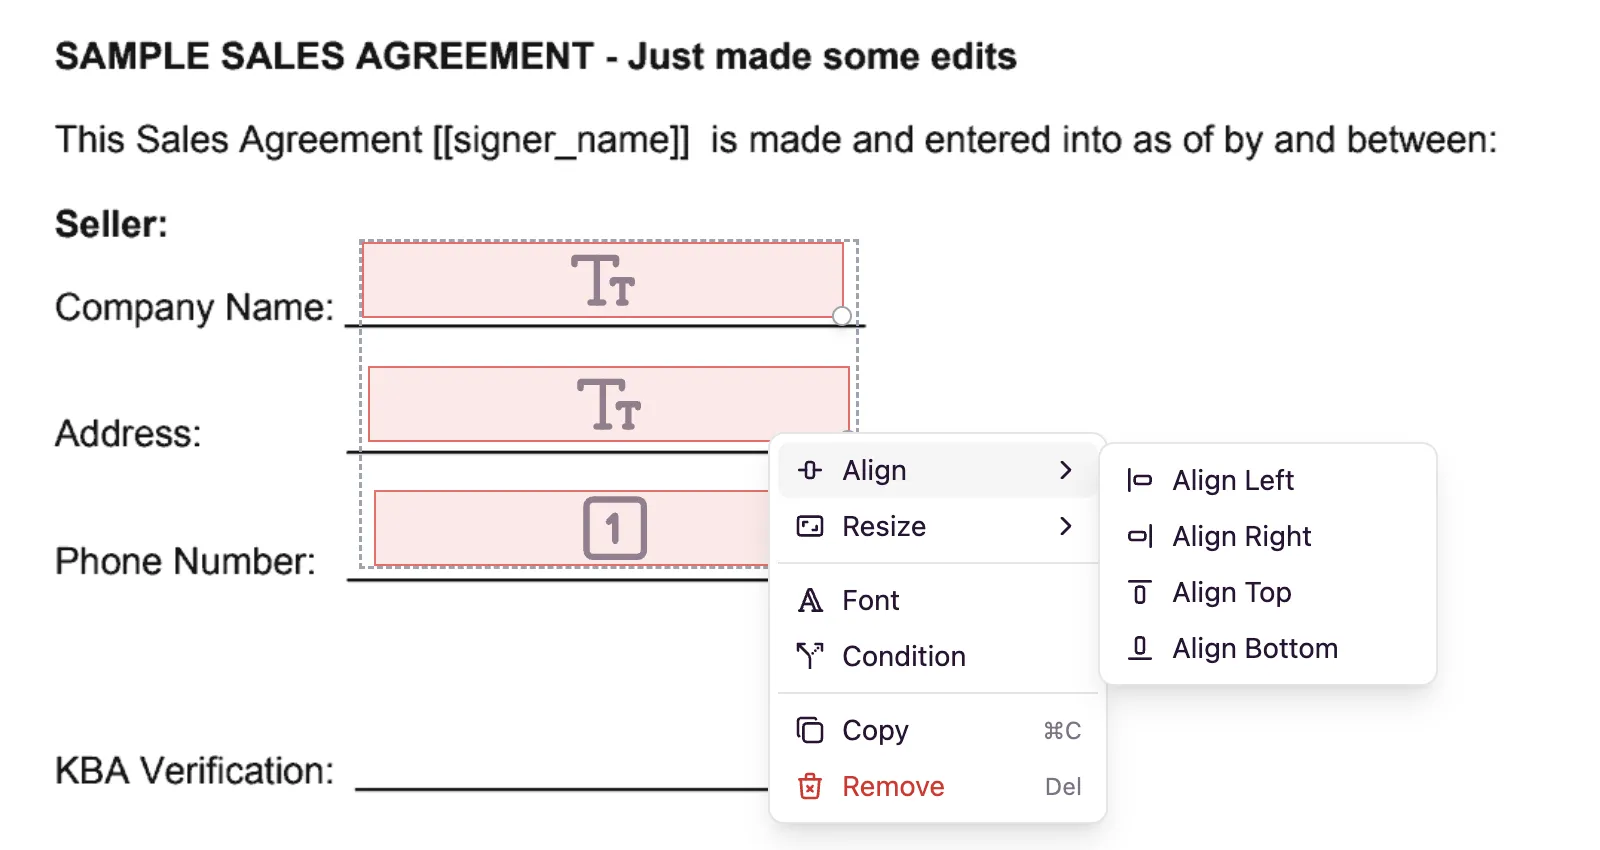
Once you have a group of fields highlighted, right-click any of them to open the Group Context Menu. Actions taken here apply to every field in your selection. For example:
- Align and resize to make sure their placement is uniform.
- Apply uniform font settings (size, type, weight) across the entire group to ensure visual consistency.
- Copy the selected fields and paste them into a different template or a different spot within the same template.
- Make the fields conditional. Learn more about conditional fields here.
Copy & paste fields
Your field configurations aren’t locked to a single page.
- Select your group of fields.
- Use CTRL+C to copy the entire group (including their underlying settings and logic).
- Navigate to a different page or an entirely different template.
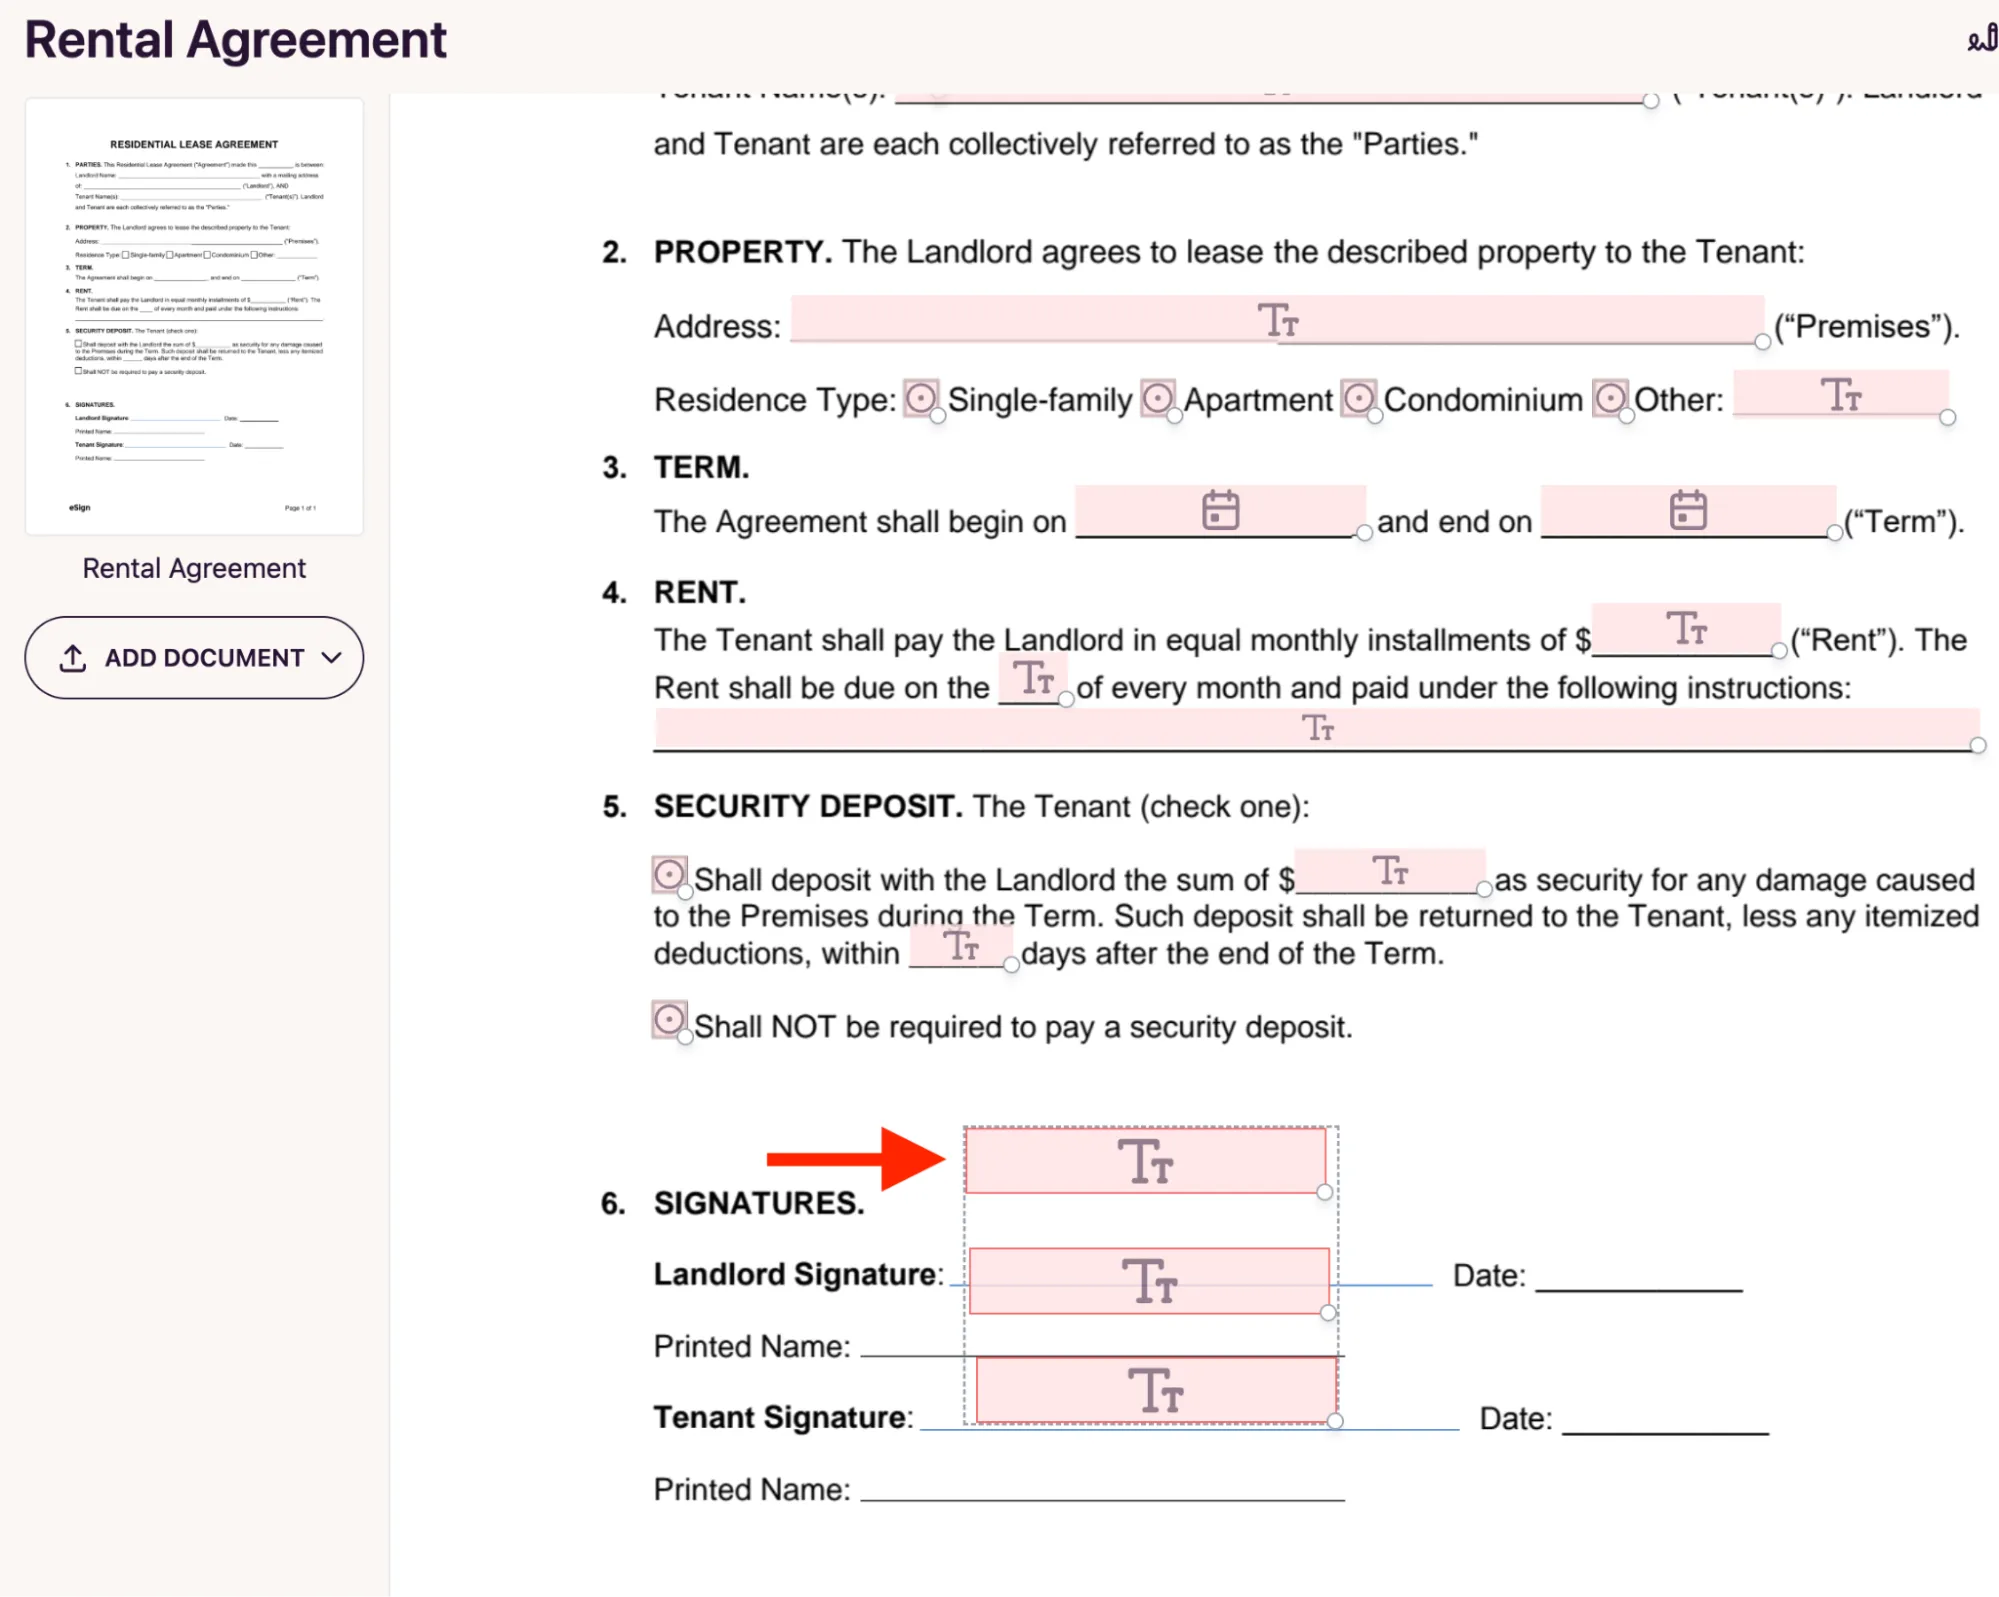
- Use CTRL+V to paste. The fields will retain their relative positioning and all custom settings.
In this example we copied 3 fields from the sales agreement template to the rental agreement template.
Field positioning & size
- Use Arrow Keys to move selected fields 1px.
- Use ALT + Arrow Keys to adjust dimensions.
- With multiple fields selected, use the context menu to Align (Left, Right, Top, Bottom) or Match Size (Width/Height) so they are perfectly uniform.
AI-powered field detection
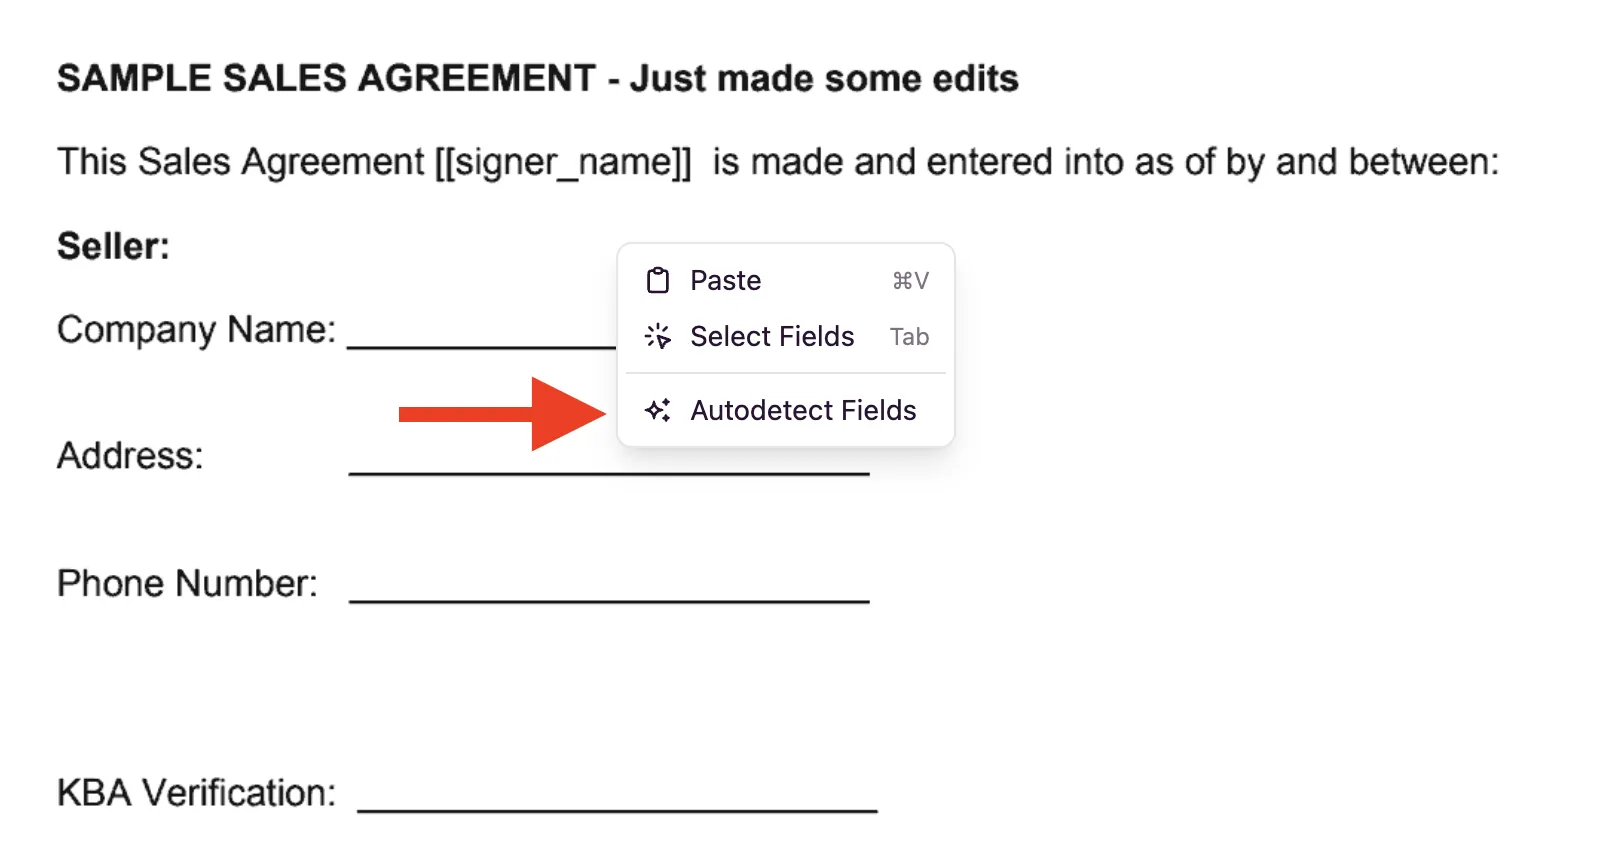
Save time on manual placement. Right-click any page and select Autodetect Fields. DocuSeal will analyze the document text and automatically place fields where it detects labels like Date, Full Name, or Signature.
Revisions history
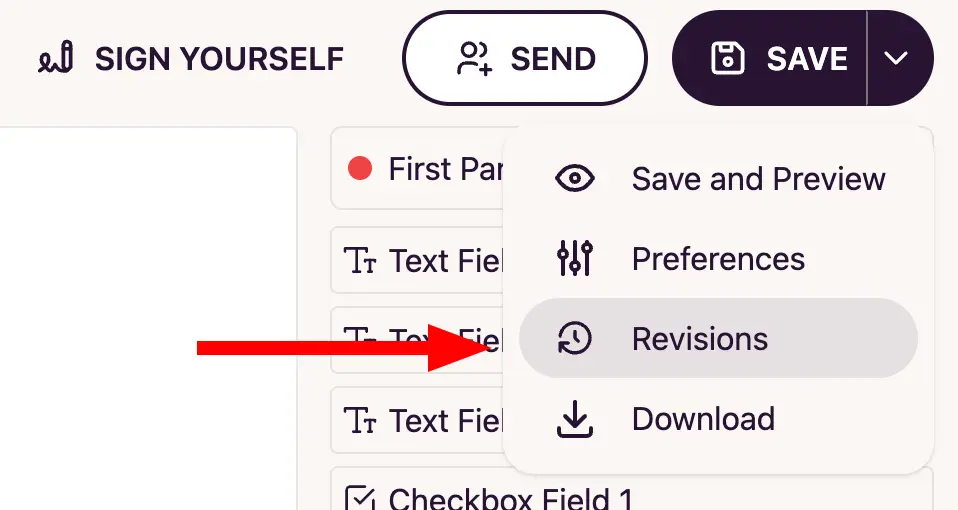
Edits in the template editor are autosaved continuously, but autosaves don’t create a revision. A new revision is recorded only when you click the Save button in the top-right corner. To browse past revisions, open the dropdown next to the Save button and click Revisions — from there you can review previous versions of the template and restore an earlier revision if you need to roll back changes.