Manage users and roles
Once you have registered, you are already a part of the team. However, sometimes you need to work on documents with other people and delegate tasks.
To manage your team, in the top menu click on Settings and select Users from the menu on the left.
Adding a new user
- Click on the New User button in the top right corner.
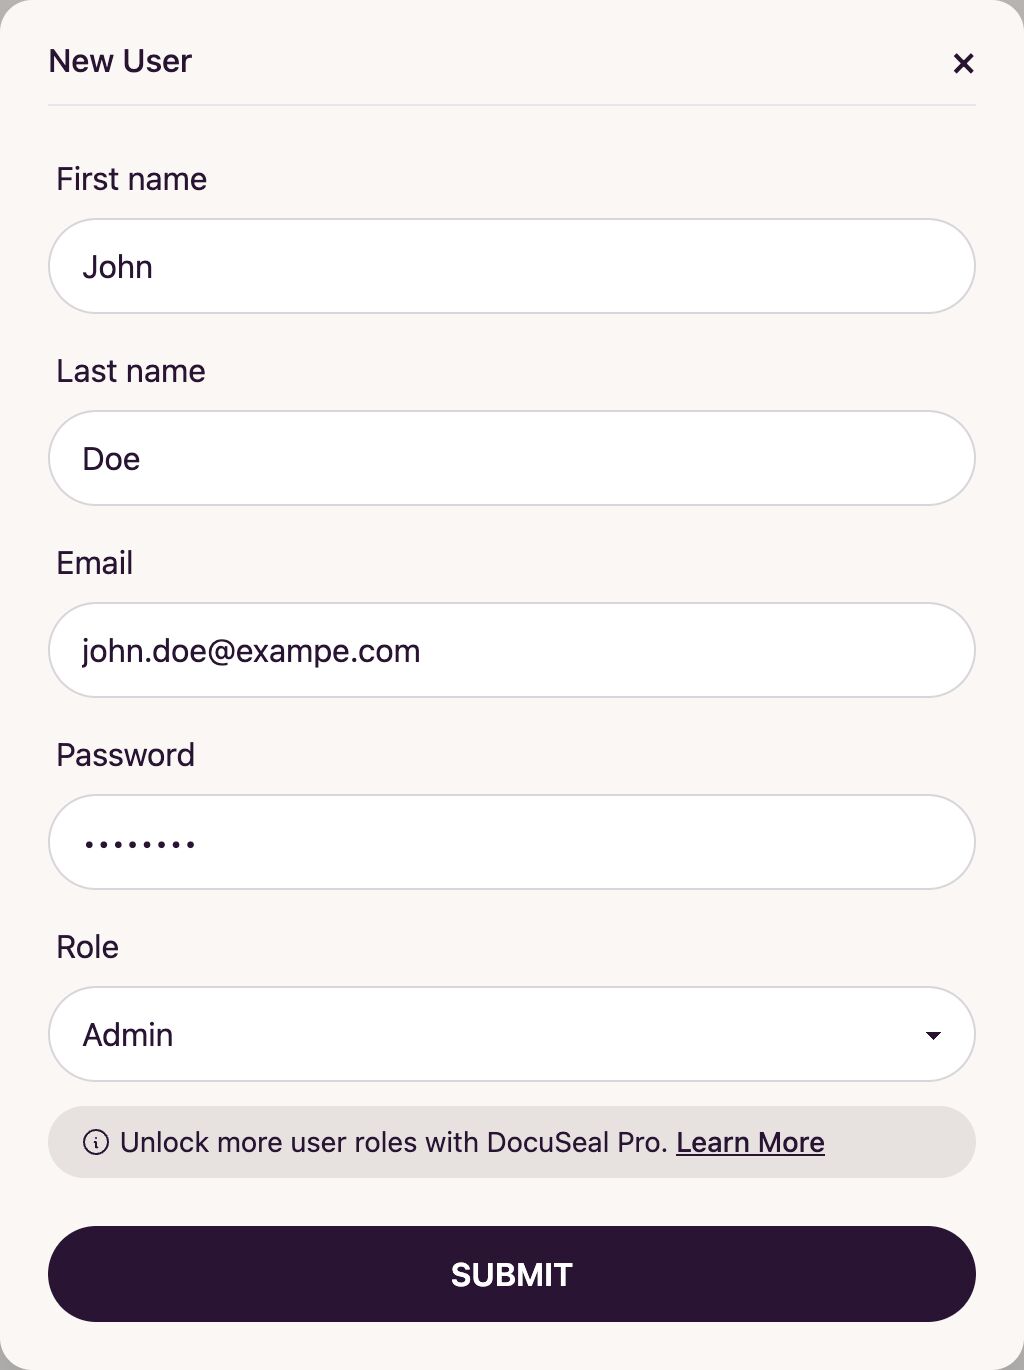
- In the pop-up modal window, enter the user’s first name, last name, and email. Also, set a password for the new user.
- If you’re using DocuSeal Pro, you can choose one of the available roles:
- Admin - full platform access.
- Editor - full documents access without access to account settings and users.
- Member - full access to own documents, read-only access to the documents and templates created by other team members, and the ability to send signature requests from all templates or clone any template.
- Agent - full access to own documents, read-only access to templates with the ability to send signature requests from templates.
- Viewer - read-only documents access without ability to request signatures.
On-premises roles:
- Superadmin - all admin permissions with ability to create, access and manage all tenant accounts.
- Tenant Admin - all admin permissions with ability to create, access and manage selected tenant accounts.
- Click on the Submit button.
- The new user will receive an email with instructions for activating their account.

Editing a user
To change user information, ensure your role has access to this feature. The user editing form has the same fields as the form for adding a new user.
- In the list of users, next to the user’s name, click on the Edit button.
- In the pop-up modal window, make the necessary changes. Click on the Submit button.
- Your changes will take effect immediately.
Removing a user
- In the list of users, next to the user’s name, click on the Remove button.
- Confirm the deletion of the user.
- The user is now removed from your team and will no longer be able to access your documents.