Configuring SAML with Microsoft Entra ID
Step 1: Create a new Entra ID SAML application
- Log in to Azure Portal as an administrator.
- Click on Microsoft Entra ID in the control panel, or use the search bar at the top.
- In the left-hand menu, select Enterprise applications.
- Click on New application and choose Create your own application.
- Enter a name for your application and select Integrate any other application you don’t find in the gallery (Non-gallery).
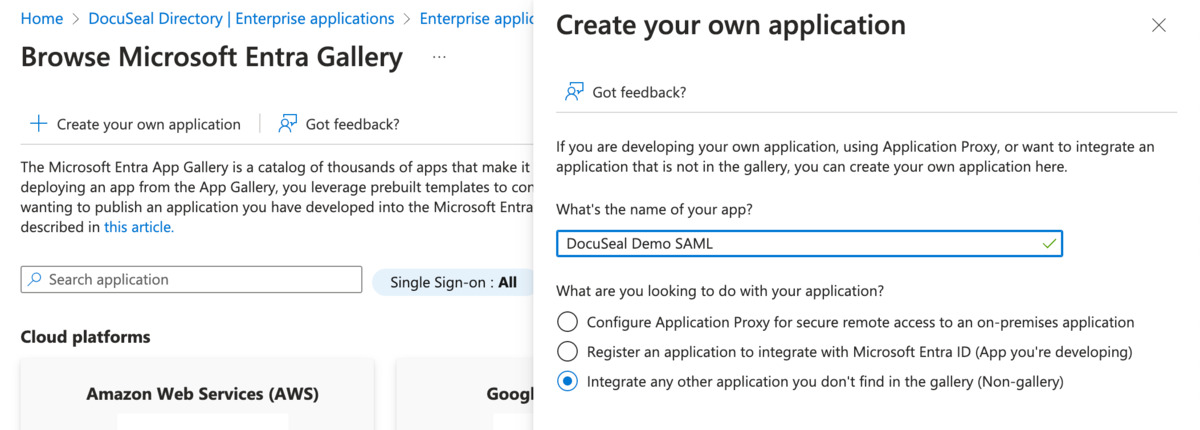
- Click Create and wait for the application creation process to complete.
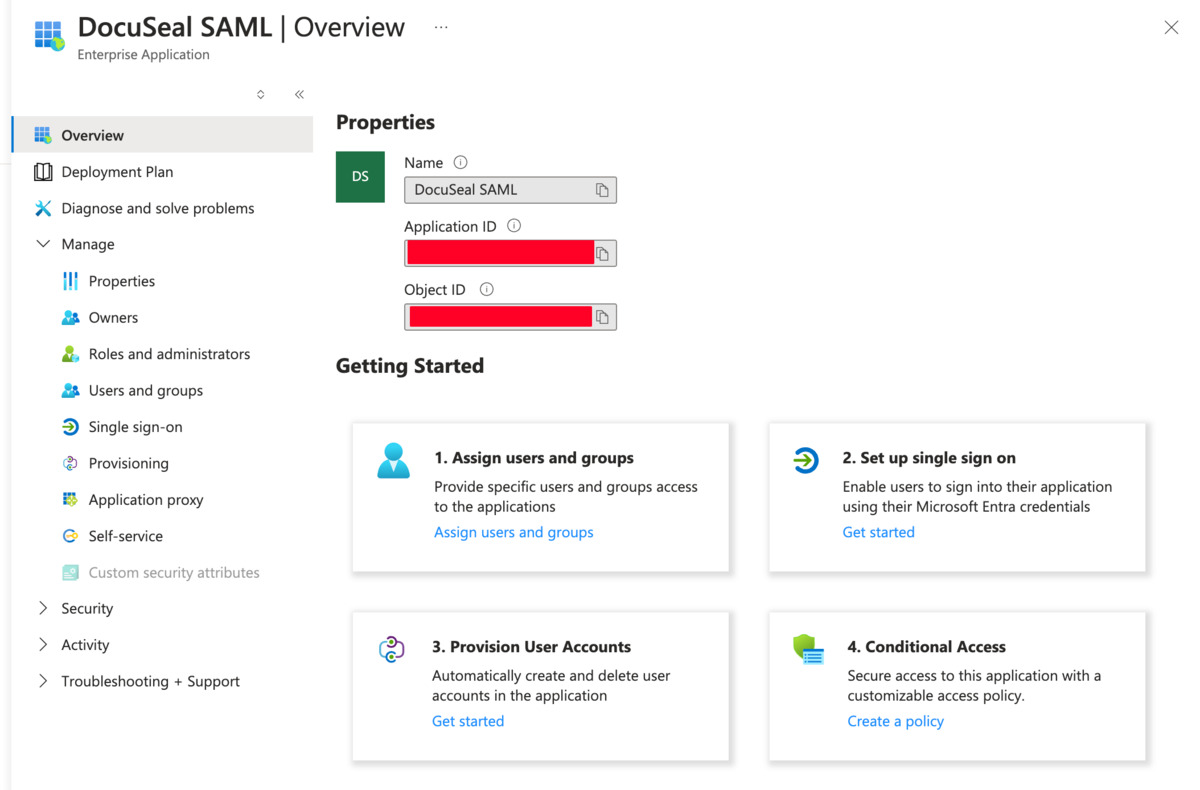
- Once the application is created, go to the application’s page and click on Set up single sign-on.
Step 2: Basic SAML Configuration
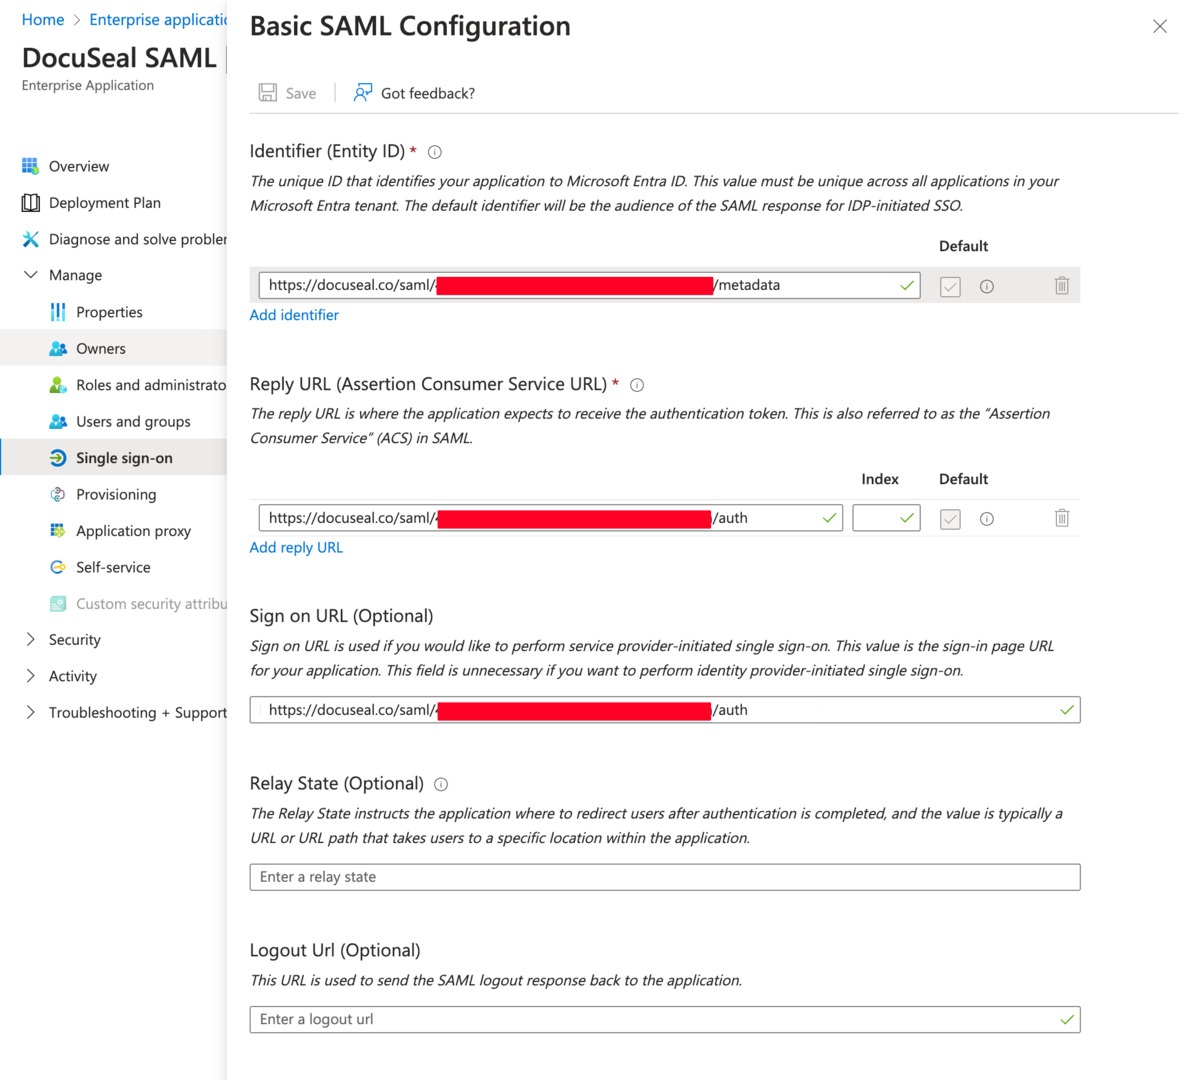
- Click on the edit icon in the top right corner of the Basic SAML Configuration block.
- Enter DocuSeal Information:
- Identifier (Entity ID): Enter the Metadata URL from the DocuSeal SAML SSO page.
- Reply URL (Assertion Consumer Service URL): Enter the Single Sign-On URL from the DocuSeal SAML SSO page.
- Sign on URL: Enter the same Single Sign-On URL from the DocuSeal SAML SSO page.
- Click Save.
Step 3: Attributes & Claims
- Click on Edit in the Attributes & Claims block.
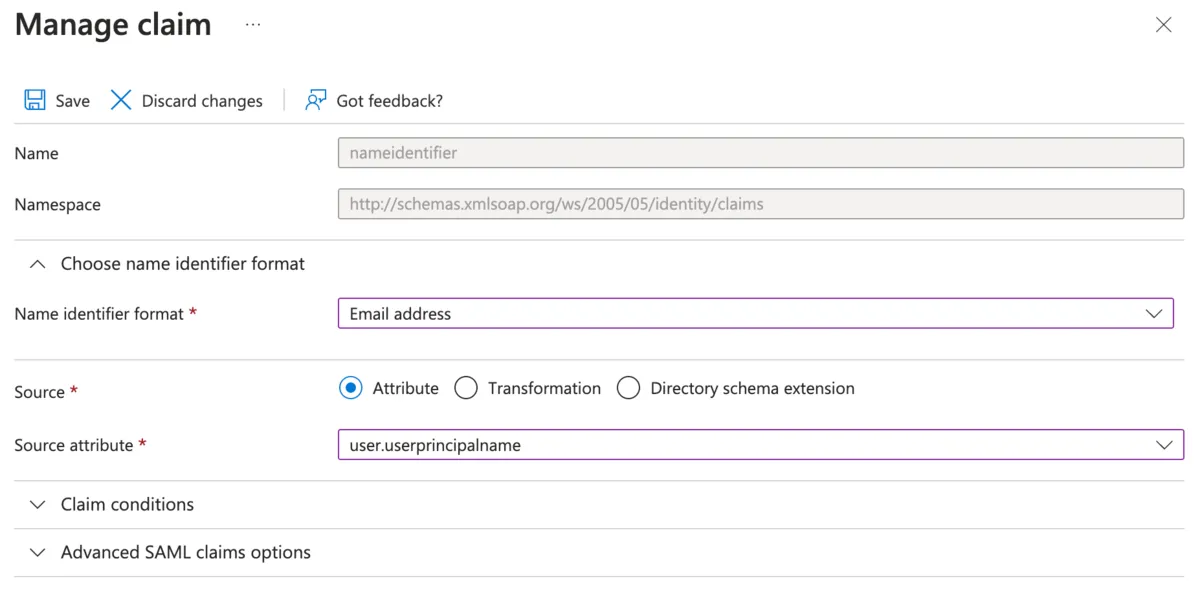
- Select the Unique User Identifier (Name ID) field.
- For the Name identifier format, choose Email Address.
- For the Source attribute, select user.userprincipalname
- Click Save.
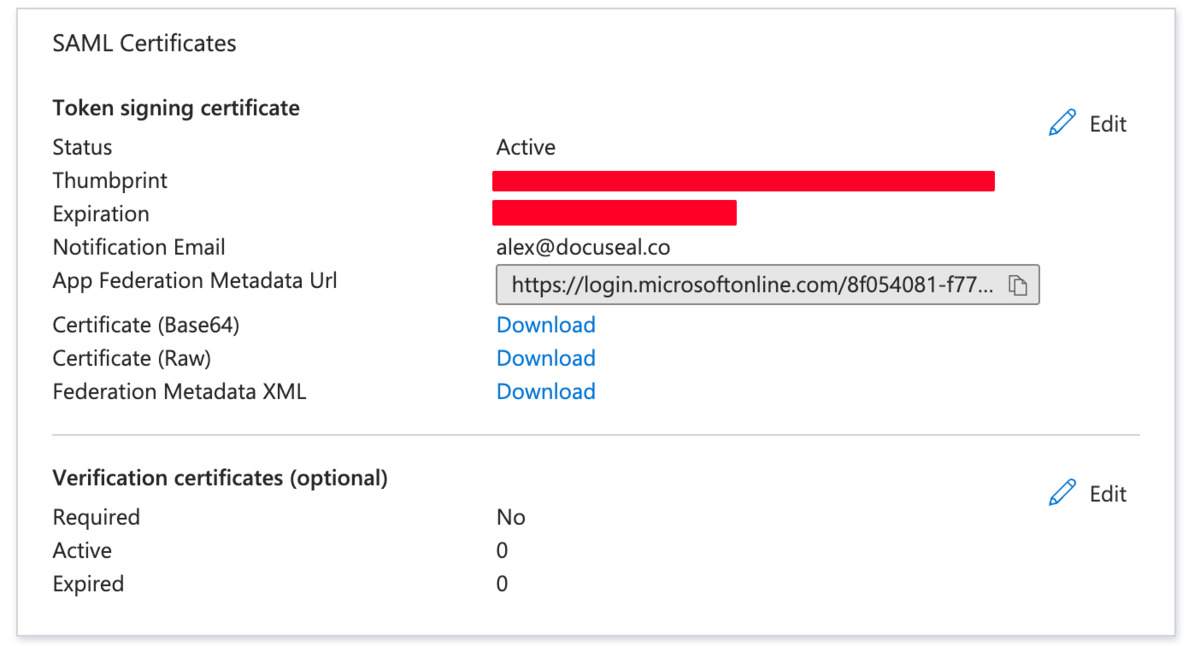
Step 4: SAML Certificates
- Click on Download next to Certificate (Base64) and save the file.
- Open the .cer file in a text editor and copy its contents.
- Paste the copied certificate content into the Certificate field in the DocuSeal SAML SSO page.
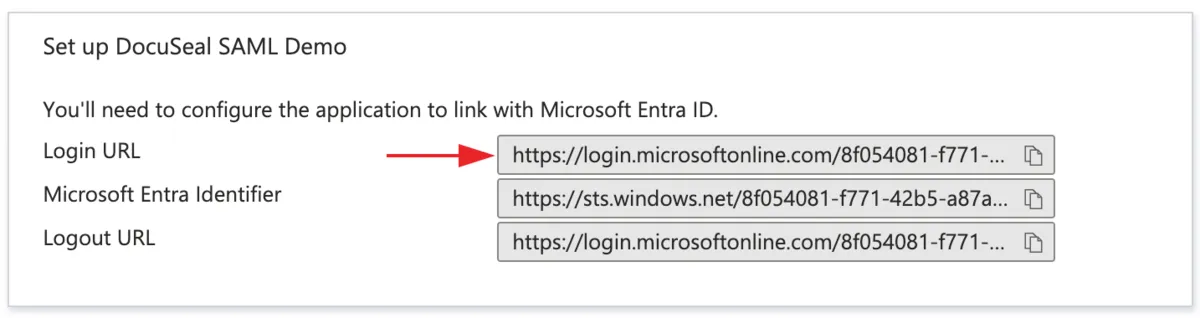
Step 5: Set up Login URL
- Copy Login URL and paste it into the SSO Service URL field in the DocuSeal SAML SSO page.
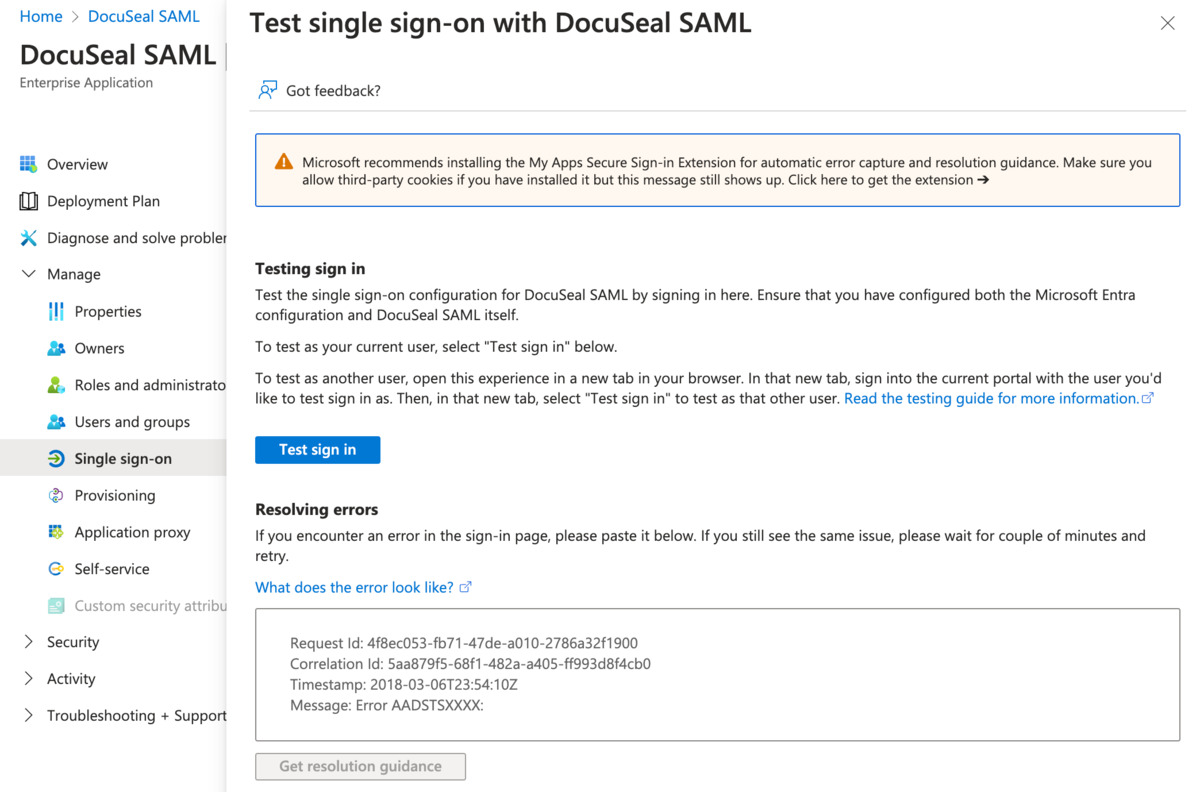
Step 6: Test single sign-on
- Click on Test at the bottom of the page.
- In the panel that opens on the right, click on Test sign in.
- If everything is working correctly, you will be redirected to the DocuSeal dashboard. If you encounter an error indicating that you don’t have access, complete step 7 and try again.
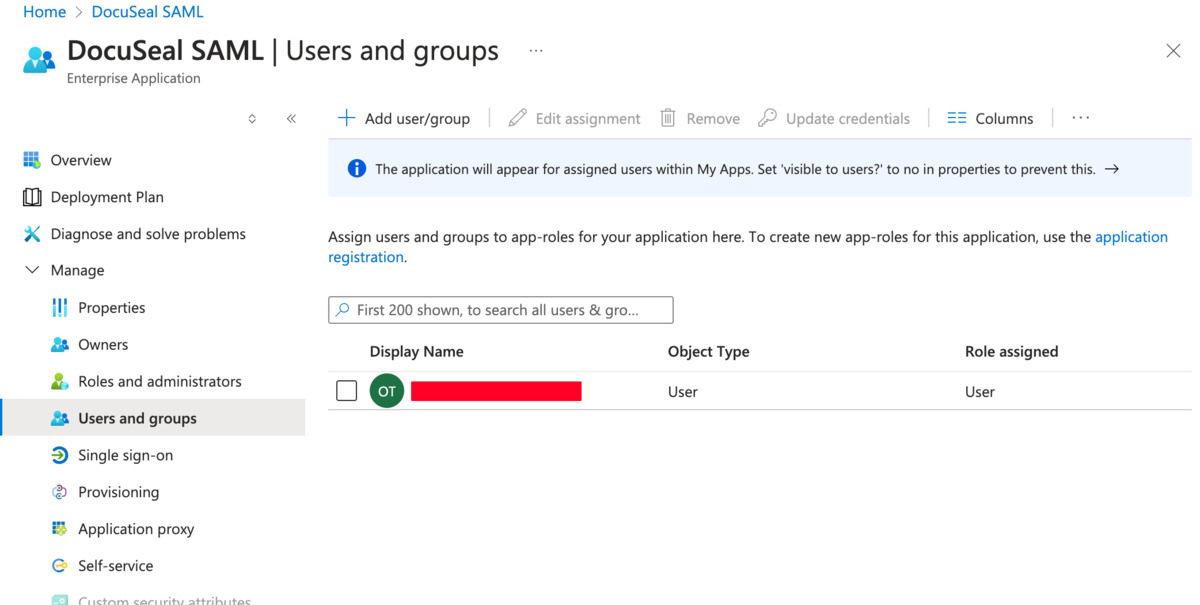
Step 7: Assign users
- Click on Users and groups in the left-hand menu.
- Click on Add user/group and select the users who should have access to DocuSeal.
- Click Select then Assign.
Ensure that the email addresses of your users in DocuSeal match the assigned Microsoft user email addresses.
This is crucial for the SAML SSO to function correctly.
This is crucial for the SAML SSO to function correctly.