Configuring SAML with Google Workspace
Step 1: Add custom SAML app in Google Admin Console
- Log in to Google Admin Console.
- Navigate to Apps: Go to Apps > Web and mobile apps.
- Add Custom SAML App: Click Add App and select Add custom SAML app.
- Enter App Details:
- App Name: Enter a name for your app.
- App Icon: Optionally, upload an icon.

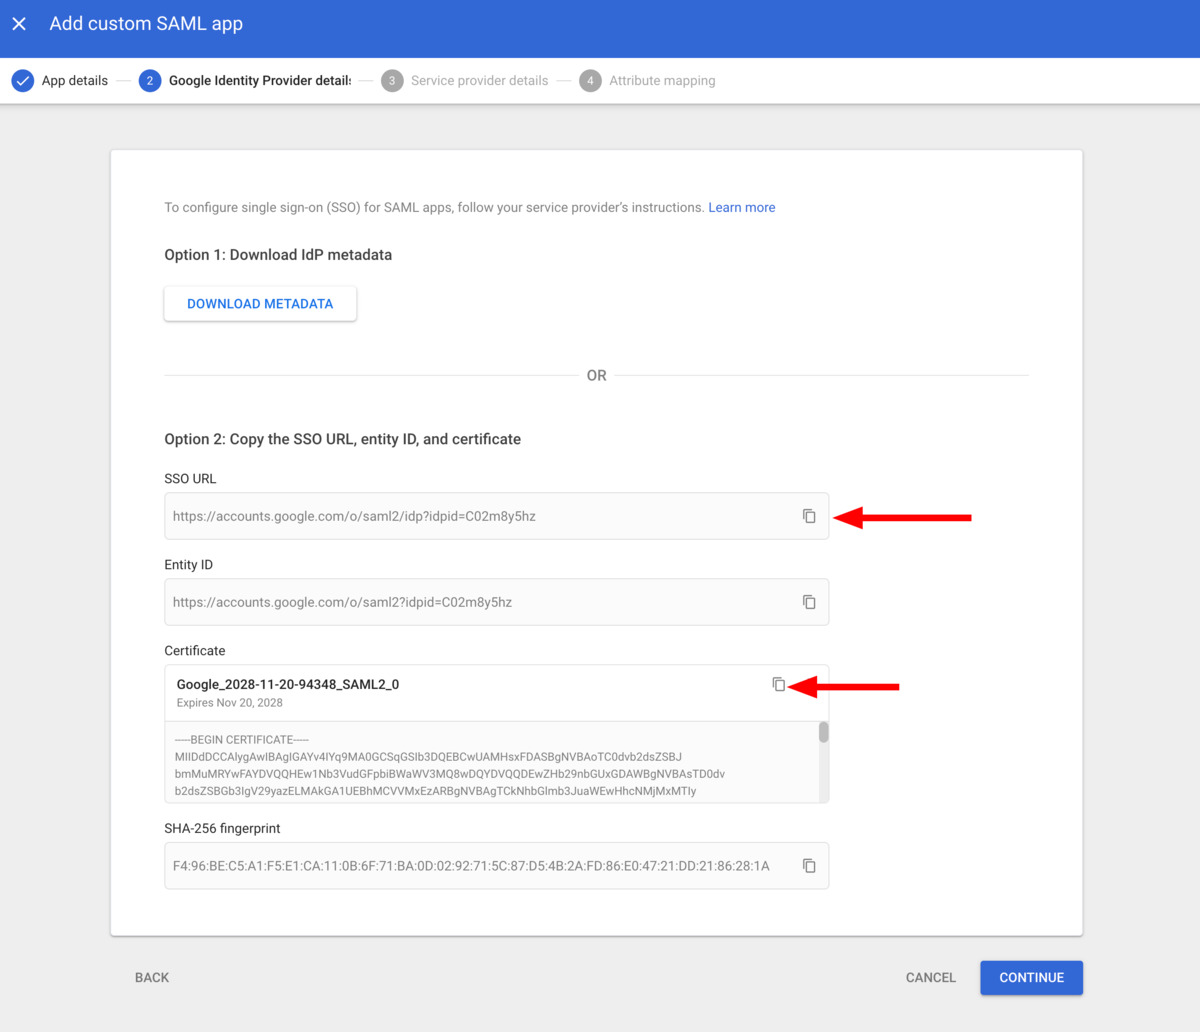
Step 2: Google Identity Provider details
- On the Google Identity Provider details page copy SSO URL and Entity ID and the Certificate
- Copy SSO URL and paste it into the SSO Service URL field in the DocuSeal SAML SSO page.
- Copy Certificate and paste it into the Certificate field in the DocuSeal SAML SSO page.
- Click Continue.
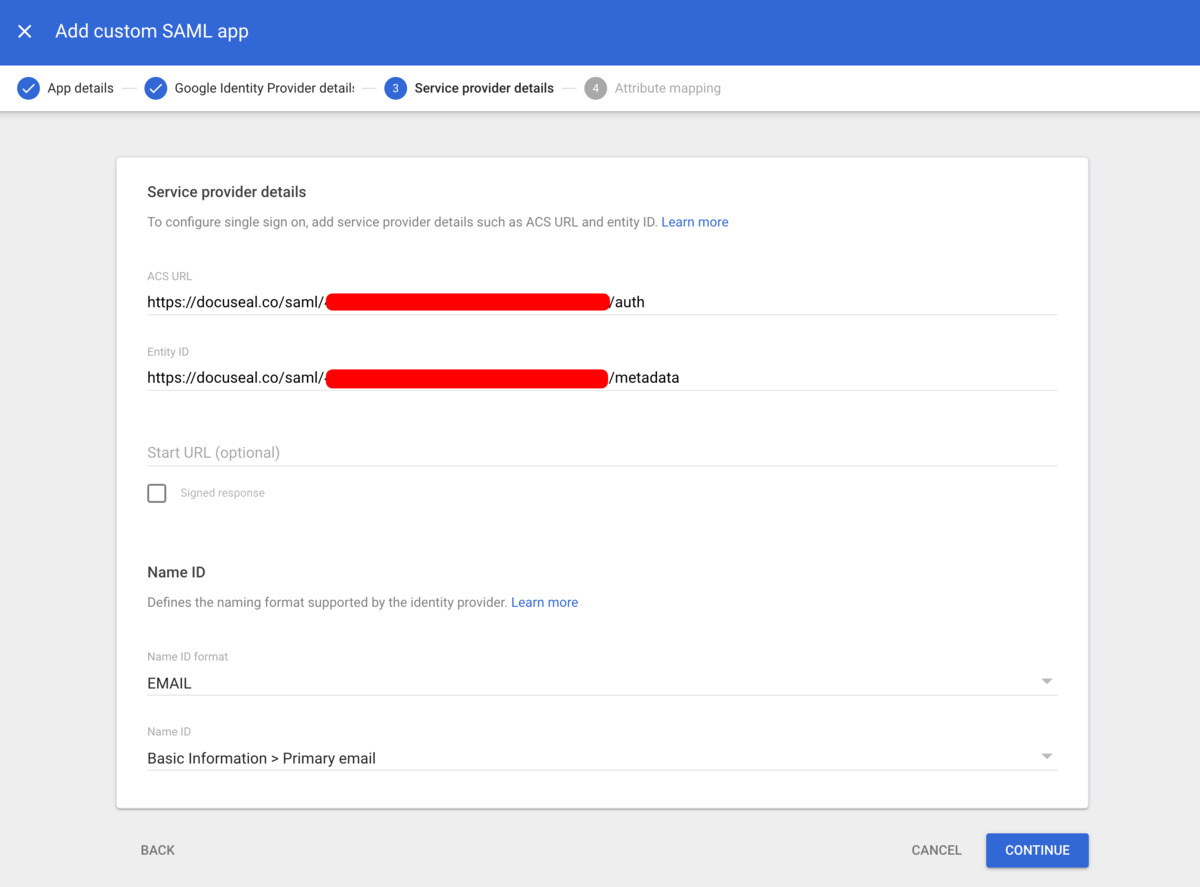
Step 3: Service provider details
- Enter DocuSeal Information:
- ACS URL: Enter the Single Sign-On URL from DocuSeal.
- Entity ID: Enter the Metadata URL from DocuSeal.
- Start URL: Optionally, enter a URL to redirect users after authentication.
- Name ID Format: Set to Email.
- Name ID: Select the Primary Email.
- Click Continue.
Step 4: Attribute mapping
- DocuSeal does not require any attribute mapping. Click Finish to complete the setup.
- Done! You have successfully configured SAML SSO with Google.
Ensure that the email addresses of your users in DocuSeal match the assigned Google user email addresses.
This is crucial for the SAML SSO to function correctly.
This is crucial for the SAML SSO to function correctly.