Configuring SAML with Keycloak
Step 1: Create a new client in Keycloak
- Log in to your Keycloak admin console.
- Navigate to the Clients section and click Create.
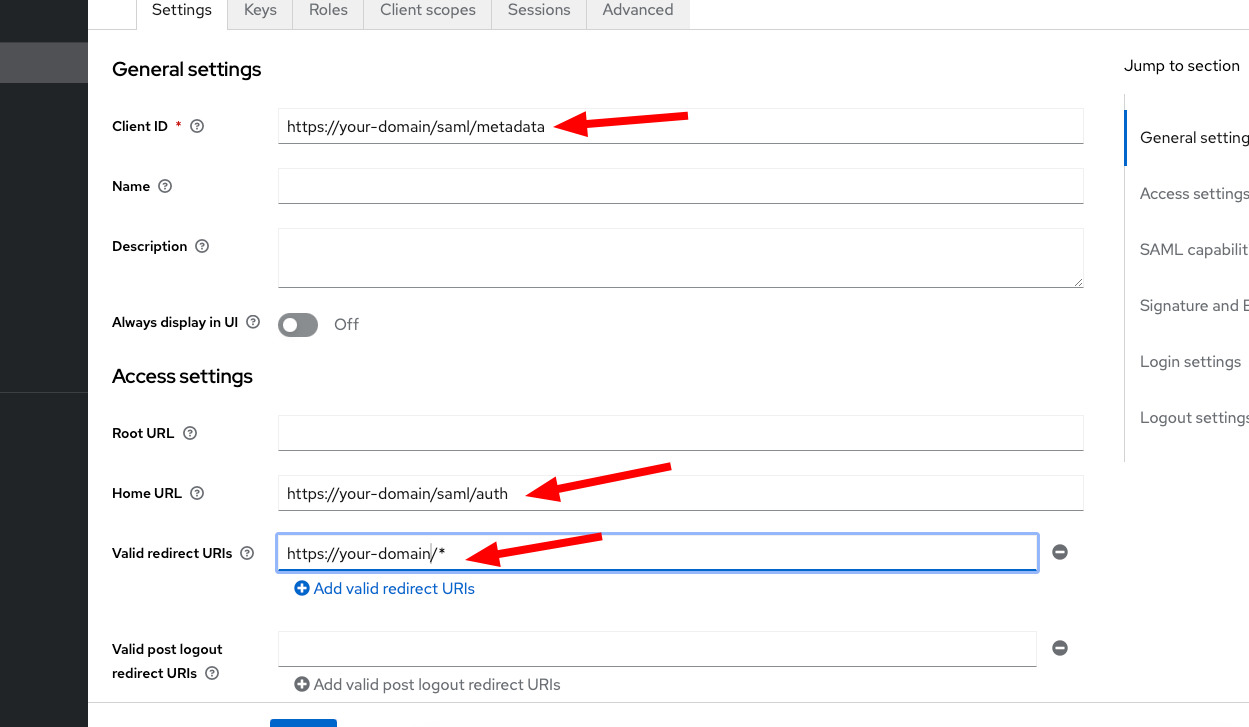
- In the Client ID field, enter the Metadata URL from the DocuSeal SAML SSO page.
- In the Home URL field, enter the Single Sign On URL from the DocuSeal SAML SSO page.
- In the Valid Redirect URIs field, enter your domain URL with a wildcard, such as:
http://your-domain/*
Step 2: Configure client settings
-
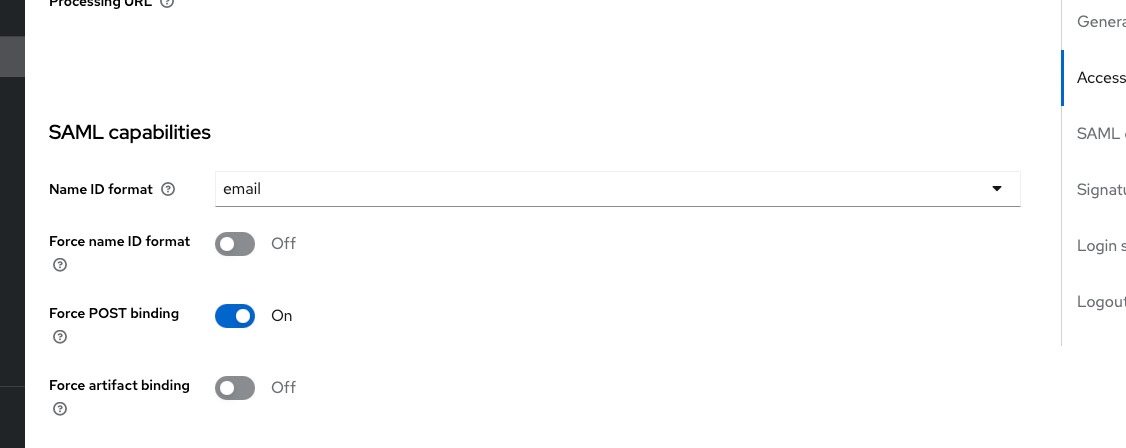
In the newly created client settings, set the Name ID Format to email .
-
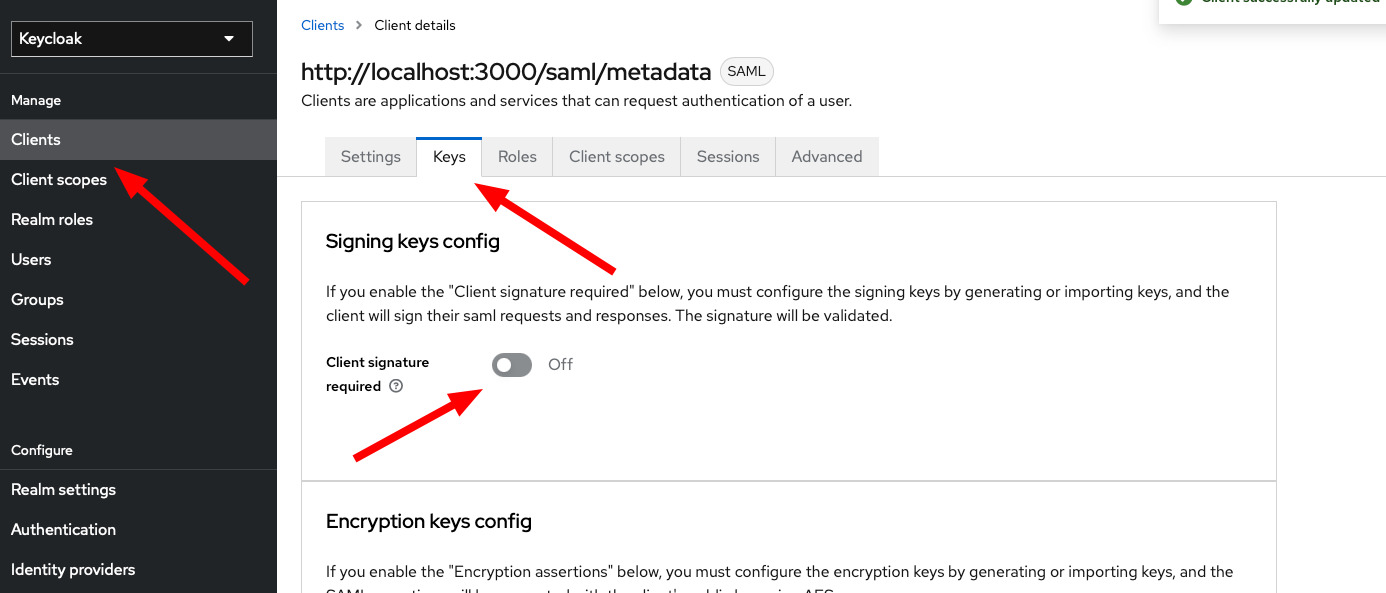
Disable the Client Signature Required option in the Client > Keys section.
Step 3: Retrieve SAML XML metadata
- Go to your Realm Settings and open the SAML XML Metadata.
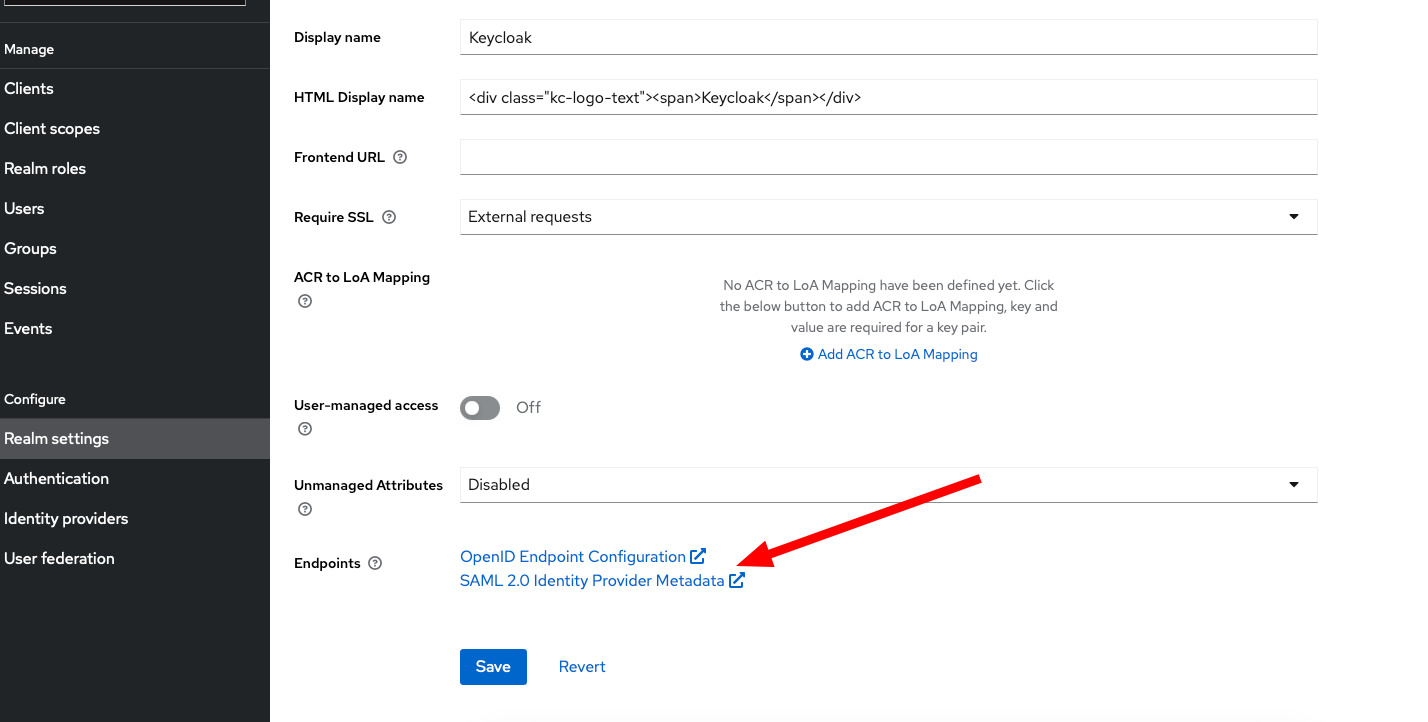
- Copy the Realm location URL from the XML and save this URL in the DocuSeal SSO Service URL form field. This URL will look something like this:
https://your-domain-keycloak.com/realms/Realm-Name/protocol/saml
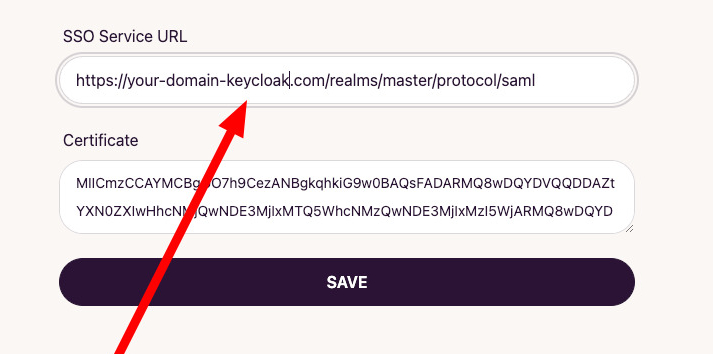
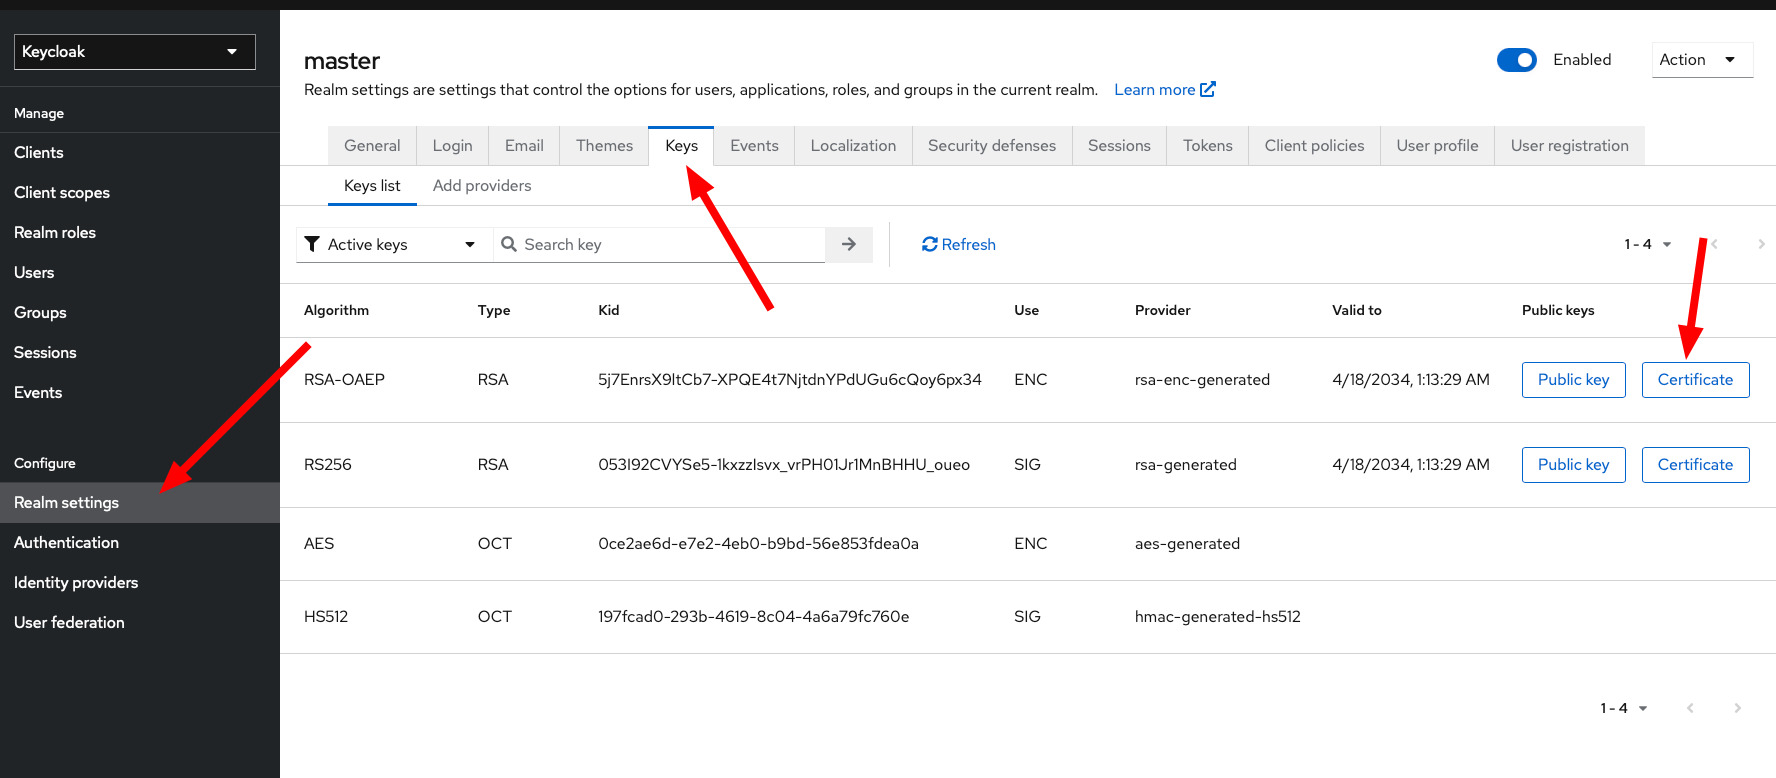
Step 4: Retrieve and configure the certificate
- Go to your Realm and navigate to the Keys section.
- Copy the certificate and save it in the DocuSeal application SAML form.
Ensure that the email addresses of your users in DocuSeal match the assigned Keycloak user email addresses.
This is crucial for the SAML SSO to function correctly.
This is crucial for the SAML SSO to function correctly.