Configure SAML with Authentic
Step 1: Create a new SAML service provider in Authentic
- Log in to your Authentic admin dashboard.
- Navigate to Applications > Providers and click Create.
- Choose SAML Provider as the provider type and click Next.
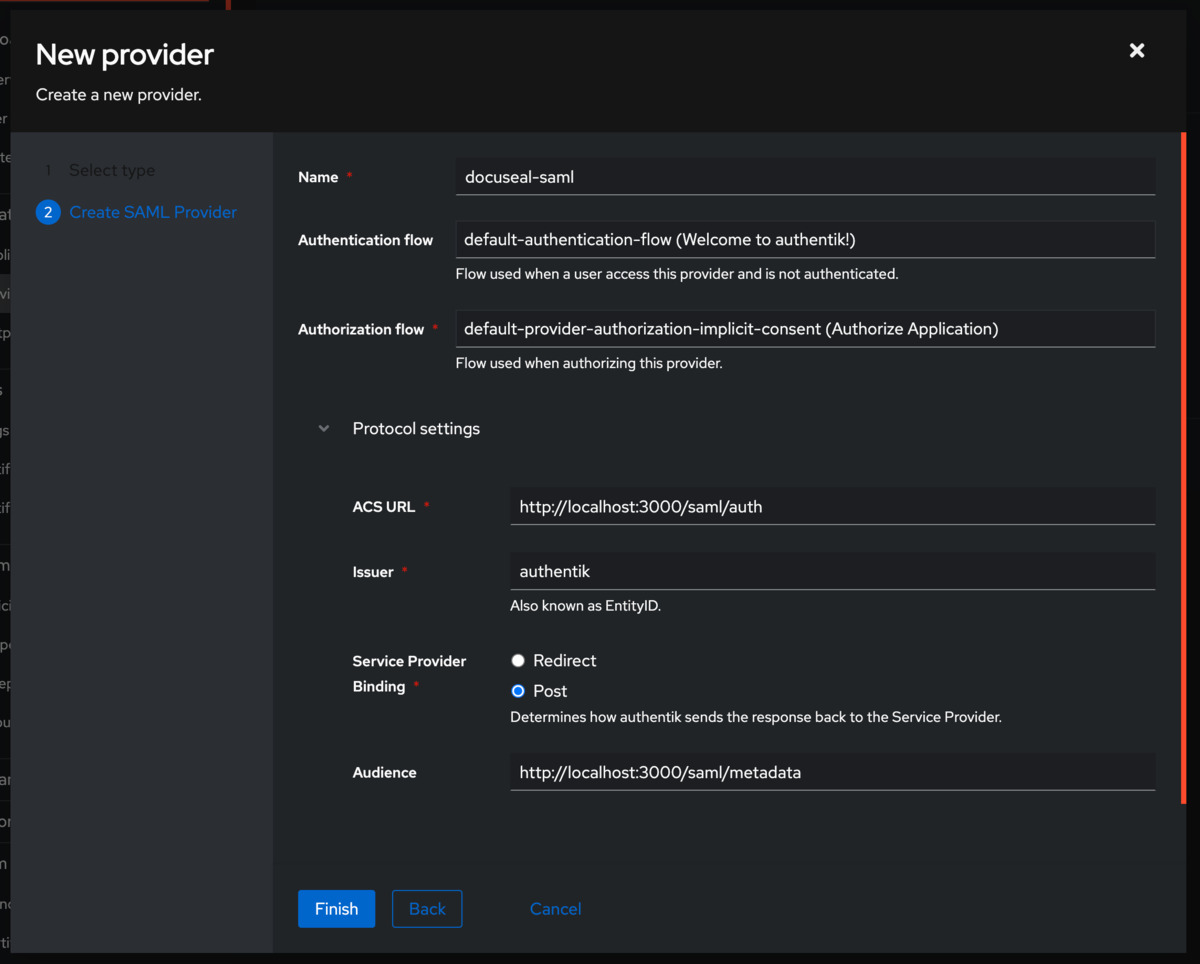
- Fill in the following fields:
- Name: Enter a name for your service provider, e.g., docuseal-saml
- Authentication Flow: Select the appropriate authentication flow.
- Authorization Flow: Select the appropriate authorization flow.
- ACS URL: Enter the Single Sign On URL from the DocuSeal SAML SSO page.
- Service Provider Binding: Select the POST binding.
- Audience: Enter the Metadata URL from the DocuSeal SAML SSO page.
Step 2: Configure advanced SAML settings
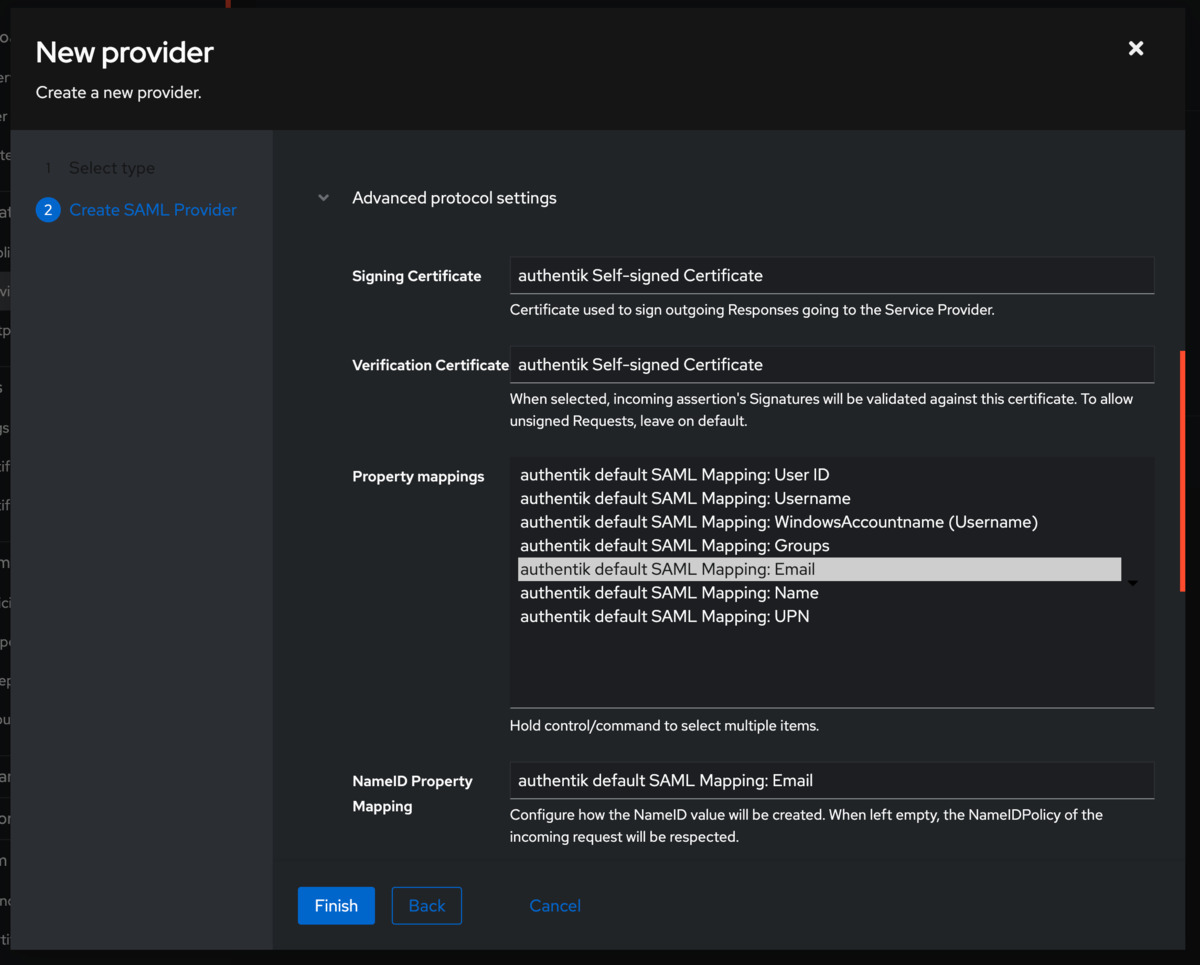
- Expand the Advanced protocol settings section.
- Choose appropriate Signing Certificate and Verification Certificate.
- Set the Email for the Property mappings and for the Name ID Property Mapping.
- Click Finish to create the service provider.
Step 3: Create an application
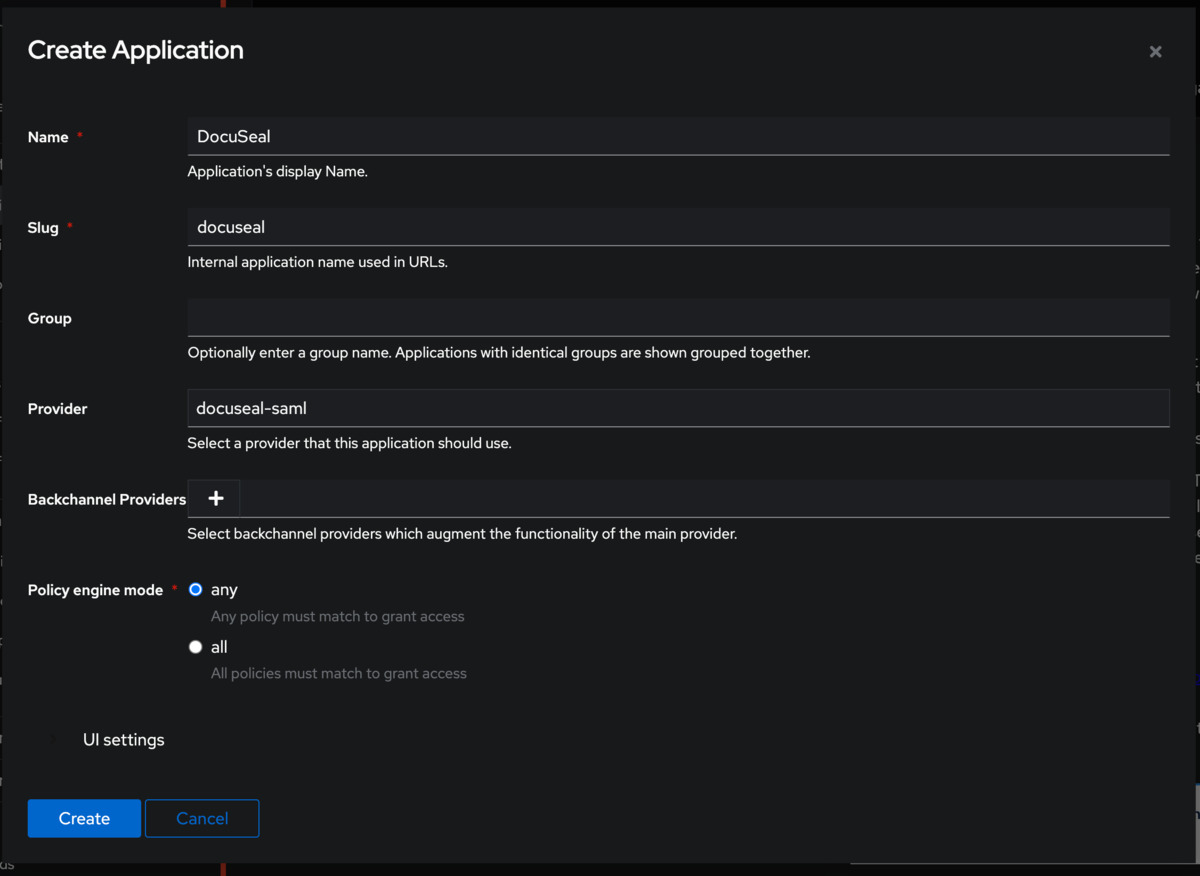
- Navigate to the Applications > Applications and click Create.
- Fill in the following fields:
- Name: Enter a name for your application, e.g., DocuSeal
- Slug: Enter a slug for your application, e.g., docuseal
- Provider: Select the SAML provider you created earlier.
Step 4: Configure DocuSeal with Authentic information
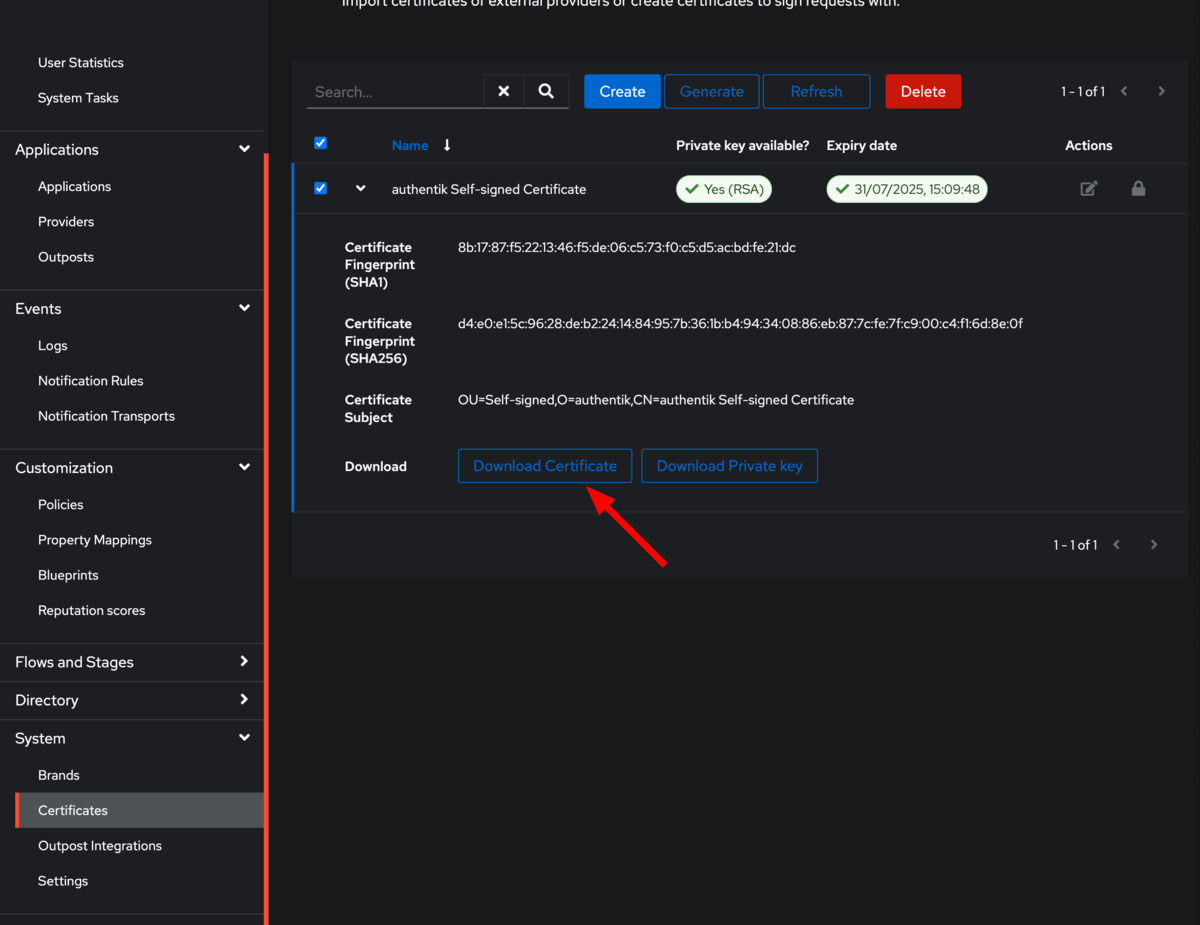
- Navigate to the System > Certificates section in Authentic.
- Click on the certificate that you selected for the SAML provider.
- Download the certificate in .pem format.
- Open the .pem file in a text editor and copy its contents.
- Paste the copied certificate content into the Certificate field in the DocuSeal SAML SSO page.
Ensure that the email addresses of your users in DocuSeal match the assigned Authentic user email addresses.
This is crucial for the SAML SSO to function correctly.
This is crucial for the SAML SSO to function correctly.