Salesforce is one of the most popular CRM systems in the world. It is a comprehensive platform that offers capabilities for automating business processes, managing customer databases, analyzing data, and much more. One of the advantages of Salesforce is the ability to customize the system in detail to fit your needs and automate many routine operations, such as sending emails, creating tasks, or changing contact statuses. However, sometimes an operation can be very simple but still difficult to access. For example, adding a review on another platform or sending a message in Slack. Sometimes, it’s enough to simply add a properly formatted URL and make this URL easily accessible to the user. To meet these needs, Salesforce provides the ability to create buttons, links, and actions.
- What are Buttons, Links, and Actions in Salesforce?
- Creating a Custom Button
- Adding the Button to the Page
What are Buttons, Links, and Actions in Salesforce?
Buttons, links, and actions are ways to add additional functionality to records in Salesforce. They can include links to external resources, sending emails, creating tasks, or any other action that can be performed within Salesforce.
Let’s consider a simple example: the Send Document to Sign button on a contact page. This button opens a page with a form for configuring and sending a document for signing.
Creating a Custom Button
Before you start, make sure you have access to Salesforce and the necessary permissions to create buttons, or ask your administrator to do this for you.
- Log in to Salesforce and navigate to the application where you want to create the button. In our case, this will be the contact page.
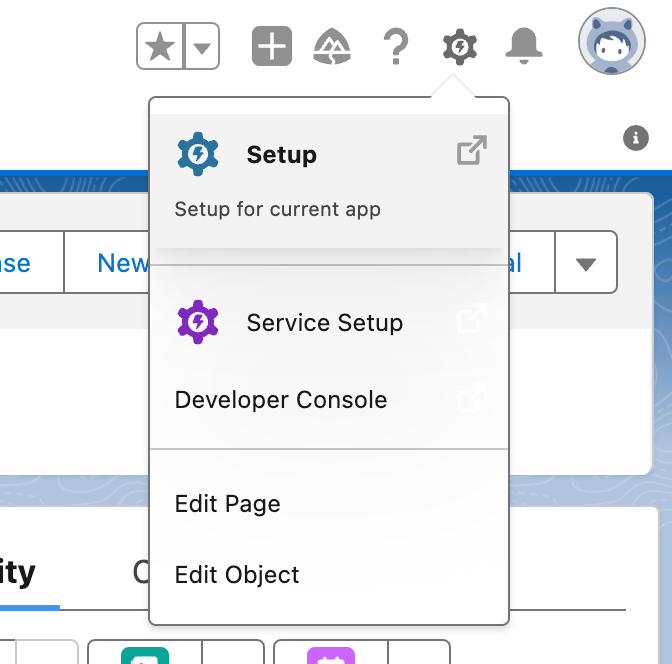
- In the top right corner, click on the gear icon and select Edit Object.
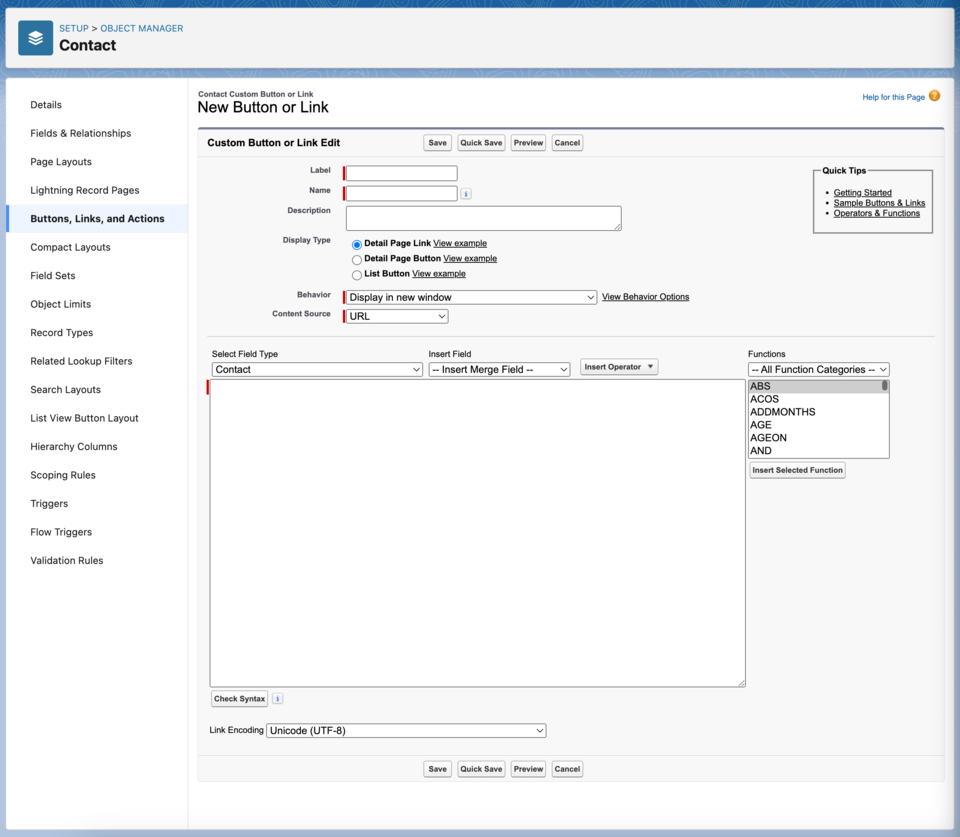
- In the object editing window, select Buttons, Links, and Actions and click New Button or Link.
- On the page that opens, you will see the following fields:
- Label - The name of the button
- Name - The unique name of the button
- Description - A description of the button
- Display Type - The type of button
- Behavior - The behavior of the button
- Content Source - The content source
- Content - The button content
Let’s take a closer look at each field.
Label
This is the name of the button that will be displayed on the page. For example: Send Document to Sign. It’s best to use short and clear names so that users can easily understand what the button does and it fits well with the page design.
Name
This is the unique identifier for the button, used for referencing it in the code. It can be any unique name, such as SendDocumentToSign. Avoid using spaces and special characters, as they can cause errors.
Description
This is a description of the button that appears when you hover over it. It can be useful when the button’s name cannot convey all the necessary information. For example: Send W9 form to sign.
Display Type
This field defines the type of button and how it will be displayed on the page. The available options are:
- Detail Page Link
- Detail Page Button
- List Button
Behavior
This field defines how the button will interact with the user. The available options are:
- Display in new window - The button opens the link or action in a new window. This is the simplest option and works well in most cases.
- Display in existing window with sidebar - The button opens the link or action in the same window, but with the sidebar included. This can be useful if you need to display additional information.
- Display in existing window without sidebar - The button opens the link or action in the same window, but without the sidebar. This is useful if you need to display more information on the page.
- Display in existing window without sidebar and header - The button opens the link or action in the same window, without the sidebar and header. This option maximizes the available space for displaying information.
- Execute JavaScript - The button executes JavaScript code. This option requires some programming skills and can provide more customization options for the button but may be more complex to use.
Content Source
This field specifies the source of the button’s content and determines what the button will do. The available options are:
- URL - The button will link to an external resource. For example, it can open a page to send a document for signing. This is a very simple and versatile option as many applications and services can open pages via a URL.
- OnClick JavaScript - The button will execute JavaScript code. This is useful if you need to perform complex actions that cannot be done with a URL. For example, sending an AJAX request to a server or opening a modal window.
- Visualforce Page - The button will display a Visualforce page. This is useful if you need to display more information on the page or perform complex actions. Visualforce is a programming language that allows you to create custom pages and components in Salesforce.
Content
This is the actual content or action the button will perform. For example, it could be a URL, JavaScript code, or a Visualforce page. You can use variables that will be replaced with actual values when the button is displayed. All available variables can be found in the Insert Field selector above the text field. For example, you can pass the contact ID or the user’s name, which can be very useful for external services.
Now that we know the purpose of each field, let’s create the Send Document to Sign button. This will be a very simple button that opens a page for configuring and sending a W9 form for signing. For this, we need to select the following settings:
| Field | Value |
|---|---|
| Label | Send Document to Sign |
| Name | SendDocumentToSign |
| Description | Send W9 form to sign |
| Display Type | Detail Page Button |
| Behaviour | Display In new window |
| Content Source | URL |
| Content | https://docuseal.com/new?url=https://www.irs.gov/pub/irs-pdf/fw9.pdf&contactId={!Contact.Id} |
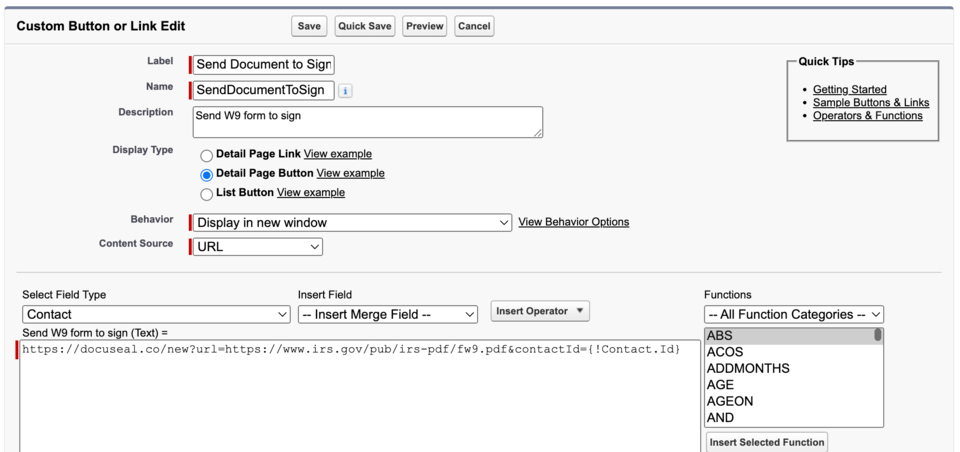
After entering all the settings, click Save. The button is now available for use on the contact page.
Adding the Button to the Page
After creating the button, you need to add it to the page. Follow these steps:
- Navigate to the desired page (in our case, the contact page) and click the gear icon in the top right corner.
- From the dropdown menu, select Edit Page. This will open the page editor.
- Click on the block where you want to insert the button. Note that Salesforce has restrictions on the size of blocks and the number of buttons, so it may not always be possible to insert the button in the desired place. If you can’t insert the button in your preferred location, try placing it in another block.
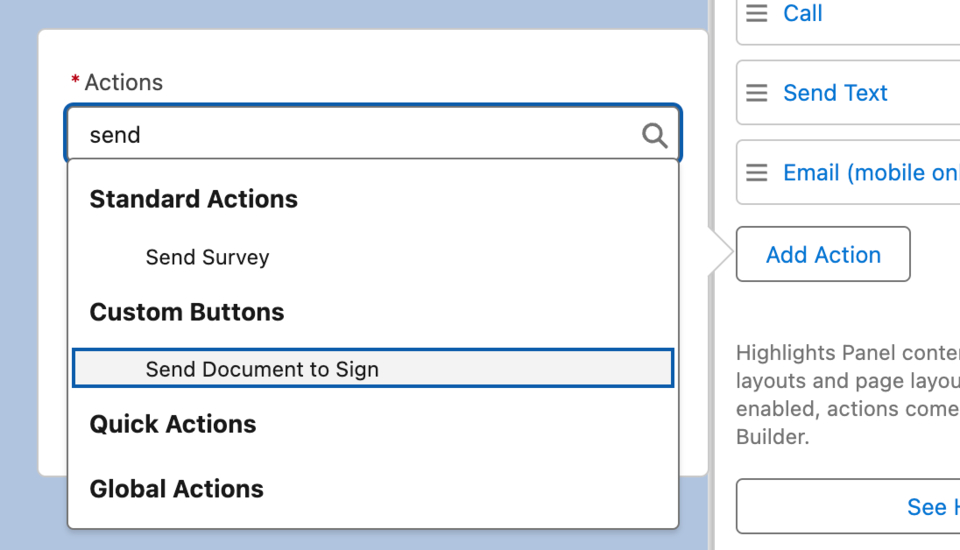
- A right-hand menu will appear, where you can add the button by clicking on the Add Action button. Sometimes, this button may be unavailable, and instead, you might see a block with the heading Upgrade to Dynamic Actions.
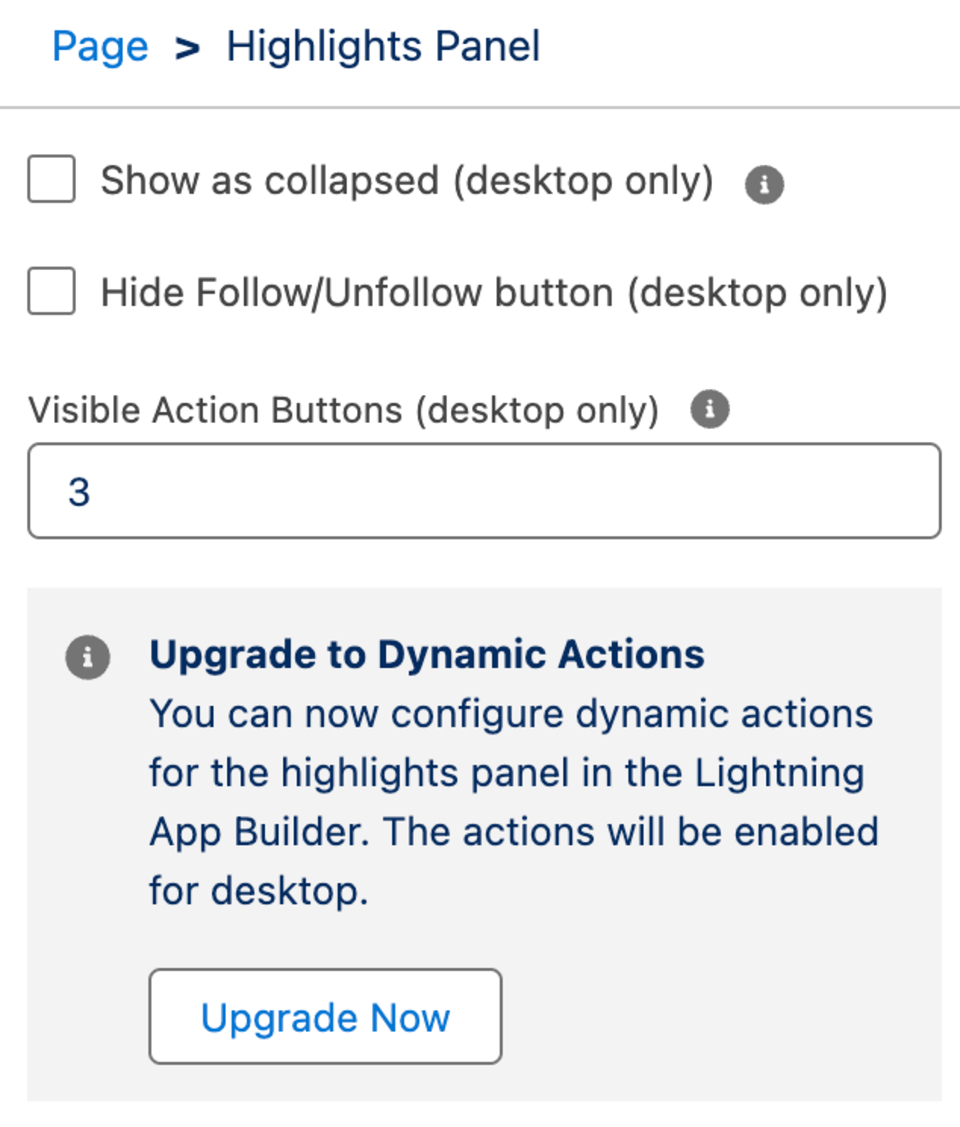 This means you need to upgrade the page to use dynamic actions.
You have two options: Migrate or Start from scratch In most cases, you can choose Migrate.
This means you need to upgrade the page to use dynamic actions.
You have two options: Migrate or Start from scratch In most cases, you can choose Migrate. - In the search bar, enter the name of the button you created earlier - Send Document to Sign - and select it.
- Click the Save button in the top right corner to save the changes.
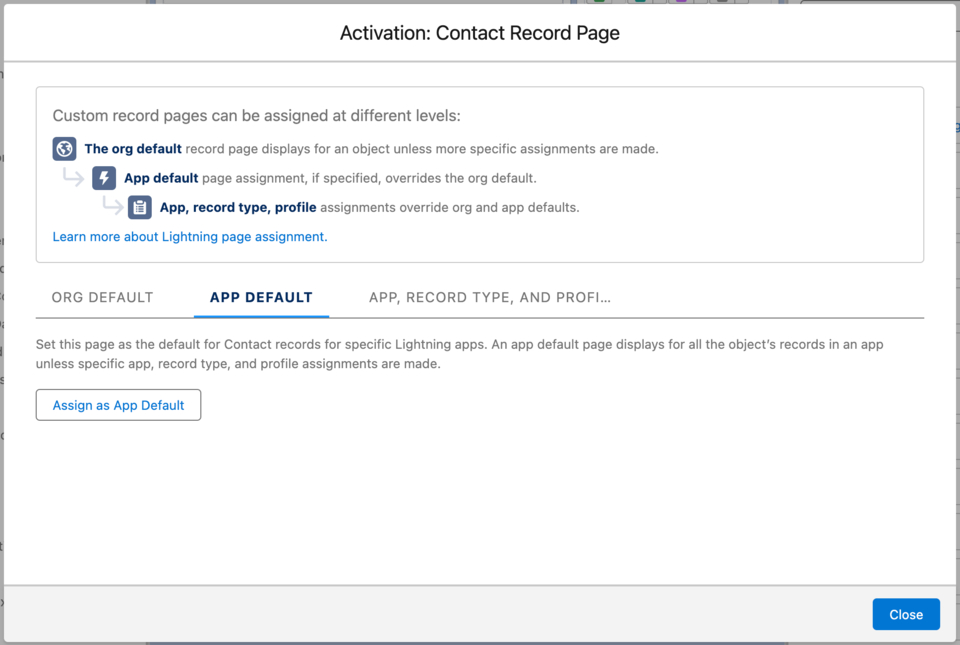
- Although the page layout has been saved, you need to activate it for the relevant application. To do this, click the Activate button in the top right corner.
- In the window that opens, you will see three options: The org default, App default, and App, record type, profile. These represent a hierarchy where:
- The org default - Settings for the entire organization
- App default - Settings for all applications
- App, record type, profile - Settings for a specific application, record type, and user profile
- Let’s activate the new contact interface only for the Sales app. Select App default and click Assign as App Default.
- In the list of apps, select Sales and click Next.
- You will now see three options: Desktop and Phone, Desktop, and Phone. Choose Desktop and Phone and click Next.
- In the final step, click Save.
- Done! Now, when you open a contact page, you will see the new Send Document to Sign button.
Now, when you open a contact page, you will see the new Send Document to Sign button. Clicking on it will open a page for configuring and sending a W9 form for signing using DocuSeal. However, this could be any other service with the required URL.
Conclusion
In this post, we explored the simplest way to create buttons in Salesforce. However, this is just the tip of the iceberg, as Salesforce offers numerous options for customizing buttons, links, and actions. You can use JavaScript, Visualforce, or other technologies to create complex buttons and links.
Additionally, you can use variables to pass data from Salesforce to external services. This allows you to create very powerful and useful buttons and links that help automate business processes and increase productivity. Despite the advanced possibilities, the principles of creating buttons, links, and actions remain the same as described in this post.